Including background images in your web pages is a great way to add depth, color, and texture to your designs. You can use backgrounds in Cascading Style Sheets to add decorative elements, such as textured backgrounds, gradients, and borders.
Using background images in multiple parts of the page makes it possible to create rich, seemingly layered, designs. For example, you can combine background images in the body of a web page, with backgrounds in div tags and other elements that appear above them.
Keep in mind, when you work with div tags, you aren’t really working with layers like the ones you’d find in Photoshop, and I’m not recommending that you use the “Layer” tag that was included in earlier versions of Dreamweaver, but the effect visually is that of a layered design.
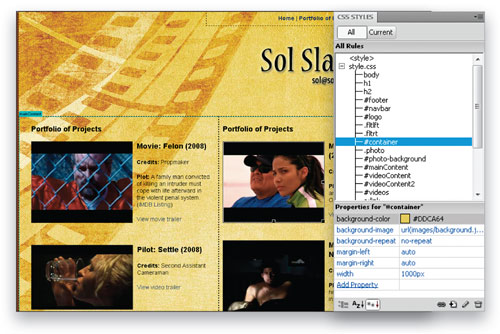
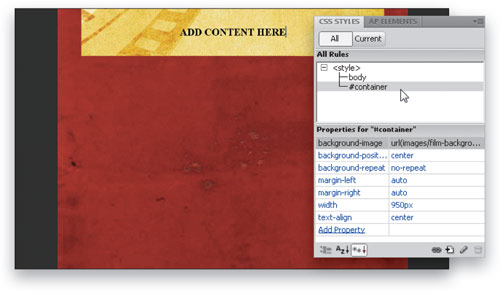
 What you see in the screenshot above is a background color defined in the body of the page to fill any space around the main design area. On top of that is a div tag centered in the browser, with a background image taht includes the yellow color and the filmstrip design elements.
Here’s how to use background images to create designs like this one, as well as many others.
1. To center a background image, use styles and div tags
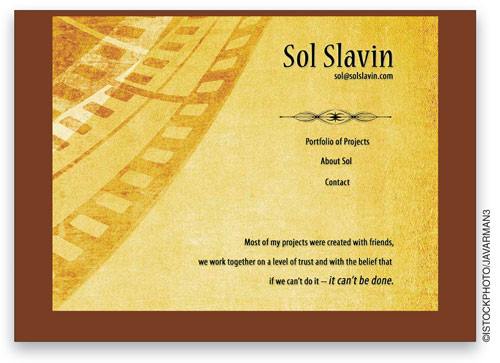
You can still add a background image to the entire body of a Web page, but don’t insert it into the HTML body tag where it will just repeat and tile down the screen. Instead, create a new CSS style for the body tag and use Dreamweaver’s CSS Rule Definition dialog to choose alignment options. Using CSS, you can control whether the image repeats on the x or y axis (across or down the page), or prevent the image from repeating at all. You can also center your background in the middle of the page.
2. You can combine background colors and background images to create more depth in your web pages
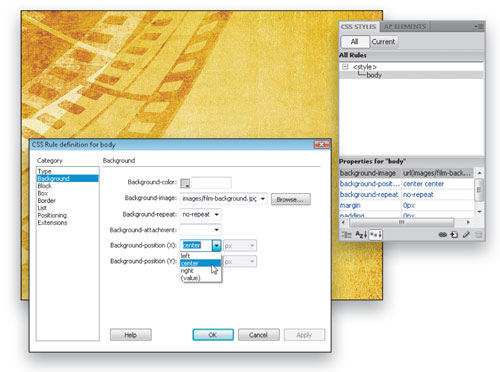
You can set background colors as well as a background images and combine them to create seemingly layered designs. In this example, I set the background color of the page to a dark gray and then inserted an image that is 1100 pixels wide using a CSS body tag style to center it on the page. On my wide monitor, I can see the color behind the background image, but on a smaller screen the background color may be cut off. Designing a page with backgrounds this way, helps create the allusion that the design fills the screen on big monitors.
3. Position a div, style it as your container, and add a background image behind your entire design area
One of the advantages of the CSS Box model, and the practice of building a page with div tags, is that you can add multiple background images to a page by placing different backgrounds in different divs on the page. Here, I’ve added to the page from the last step, inserting a div tag with an ID style #container that is set to 950 pixels in width. I centered it by setting the left and right margins to auto, and then inserted a background image that is also 950 pixels wide. The height of the #container div is determined by its content.
4. How to use longer background images to accommadate different amounts of text in divs that expand to fit their content
If you’ve done much CSS development, you’ve probably learned that it’s best not to specify a height on any div or other tag that will contain text. That’s because most browsers make it possible for users to enlarge or reduce text and you want to ensure that the page layout will adjust to the content and not cut off any text. With that in mind, if you’re using a background image, it’s good practice to make sure the background longer than your content so that as content expands down the page, the background will still cover the full area.

5. How to make a background repeat so that it fills an entire web page
As with previous versions of Dreamweaver and HTML, you can still use a background to fill an entire web page by repeating, or tiling the background across and down the page.
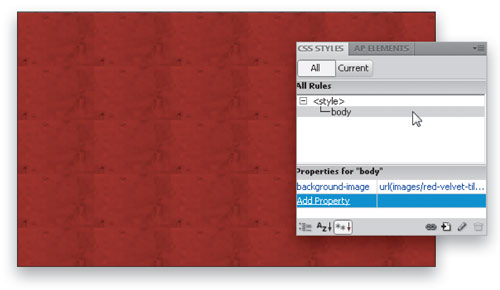
With CSS, you can target backgrounds more specifically and use repeating images in sidebars, banners, footers, or any other area of the page, as well. Experiment with the effects of using a small image that repeats. If you smooth or match the edges you can create get rid of the edges you see in this example and create a seamless effect that looks like one big image. Here the repeating image fills the entire page because it’s included in the body tag style.
6. How to insert backgrounds that repeat in specific areas of a web page
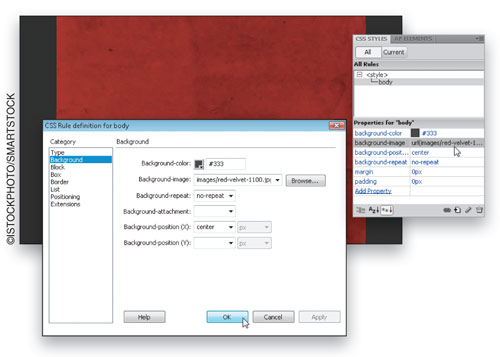
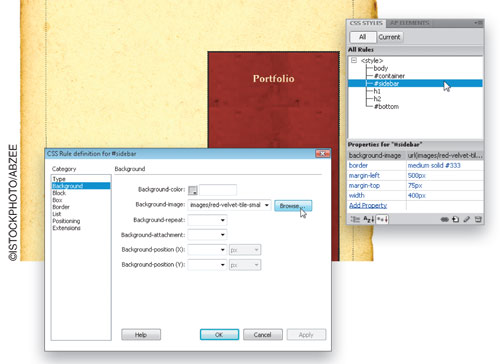
This design example demonstrates how you can repeat a background in a single div, not just the entire page. In this case, you can see that the sidebar on the right has a repeating red tiled background, but I’ve inserted a different background, one that looks like a giant sheet of parchment paper, into the main #container div, which is centered on the page.
In this case, I’ve set the body background to white to make it appear that the parchment paper, which has a white background, is floating on the page when displayed on larger monitors.
7. You can use large background images as well as small ones
In this figure, you see the same layout I used in the last step, but in this case, I’ve changed the background images. I’ve inserted a smaller version of parchment image in the background of the sidebar and then I’ve inserted the darker red image into the background of the div that is styled with the ID style #container.
I’ve also defined both styles so the background images won’t repeat, and I’ve used images that were big enough to fill their respective sections of the page so that we get a clean, non-repeating background that fills each section.
Now I can easily add text and other images inside the divs that will appear above the backgrouns to create a layered look in these page designs.
8. Make navigation buttons more interesting with background images
There are many advantages to using text instead of images for links (including better accessibility and SEO), but that doesn’t mean you can’t make your links look like images.
By using CSS to place background images behind your text links, you can create rich effects, using gradients, patterns, and anything else you can imagine.
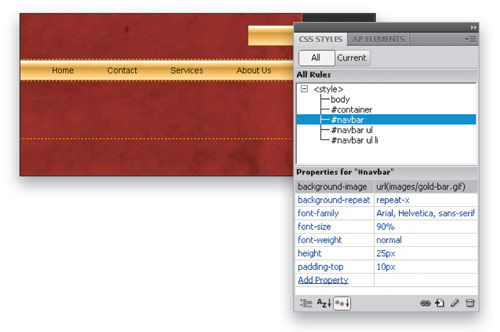
In this example, I’ve repeated a small image with a gradient effect across the x axis of a div to create the background for my site’s main navigation links. For perspective, I inserted the same image I used in the background just above the navigation bar in this example.
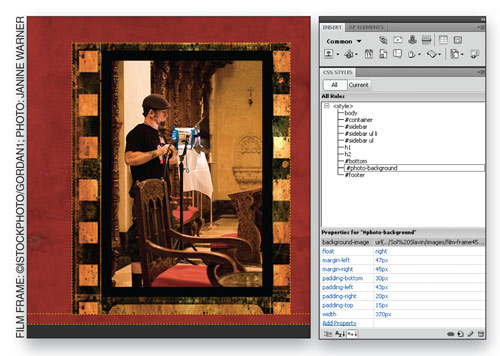
9. Use background images to create picture frames
To put a frame around a photo, consider this trick. Create a div with a style that includes a background image, and then insert the photo into the div. In the figure below, you see that I’ve used a background image that looks like a giant filmstrip to create the illusion that the photo is a just one still in a sequence of images.
The trick to making this work is to add margin and padding to position the image in the middle of the image, or align the image where you want it within the frame created by the background image.
In this example, you see the red background in the main #content div, and then a second div inside it with the id #photo-frame. That style contains a background image (it the one that looks like a piece cut from a strip of film), as well as margin and padding settings on theleft, right, top, and bottom of the image to position the photograph in the middle of the background image so that it looks like it’s all one big image.
The advantage of using the background image is that you can use the same background to frame multiple images on a web site, and you can create smaller, faster loading images when you optimize them separate from the background image.
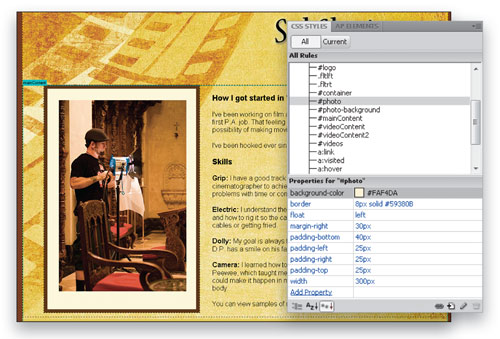
10. Frame images by creating colored borders and backgrounds in CSS
The picture frame in the figure below was created without any images. In this case, combining a background color with a contrasting border color made it possible to create a frame that looks like an image, even though it was designed entirely in CSS.
I defined a style with a thick, dark brown border and a light background color, and then used margins and padding to control the space between the photo and border. I also included a thin black frame around the photo itself.
If you design a frame like this using a class style, you can use the same style multiple times on the same page, which can help create a consistent look across a photo gallery or other collection of images. Because the frame is created with CSS, it automatically adjusts to ftot any image size and can be applied to as many images as you want.
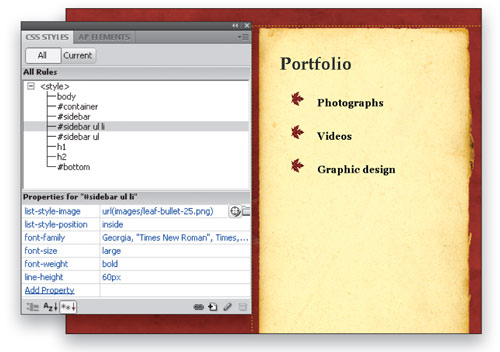
11. Using background images to change the bullets in a bulletted list
Another great way to use images in CSS is to replace the boring bullets in the list item tag. Although this isn’t a background image, I include this tip because it’s a nice addition to the tool chest of any web designer who wants to use more design elements.
Changing the bullet is as simple as creating an optimized jpeg, gif, or png file in the size you want for the bullets in your design. Then create a new style for the <li> or list item tag and use the CSS Rule Definition dialog to add the image in the List settings.
12. Preview your web pages in a browser to fully test the positioning and display of background images
To really test any CSS Layout, you need to preview your page in as many Web browsers as you can. At the very least, you should test in the latest versions of Firefox, Internet Explorer, Safari and Google Chrome.
Not all web browsers support CSS background, margin, and padding styles equally and Dreamweaver’s preview features can’t replicate all of the ways your page may be displayed.