Dreamweaver’s Behaviors panelmakes it possible to create complex interactive features using Javascript, even if you don’t know Javascript. And that’s cool because writing JavaScript is a lot more complex than writing HTML or CSS.
Using Behaviors you can add interactive features like complex rollover effects, pop-up windows, and jump menus. When you set up a Behavior in Dreamweaver, you select an Action, like a pop-up window opening, and set it to be triggered by an Event, like a user rolling their cursor over an image or clicking on some text. You can apply Behaviors to almost any element on a page and even to the page itself if you to create effects that occur when a page is loaded.
In this tutorial, we’ll use the Swap Image Behavior to change the display of many images at once. Although this is the same Behavior that is commonly used to create simple rollover images, we’ll be doing much more than swapping one image with another. As you’ll see in the steps that follow, you can use the Swap Image Behavior to replace any or all of the images on a Web page, a great way to create an interactive slide show for a collection of photos or artwork.
Follow these instructions to create this cool rollover effect.
STEP 1 Study the Design
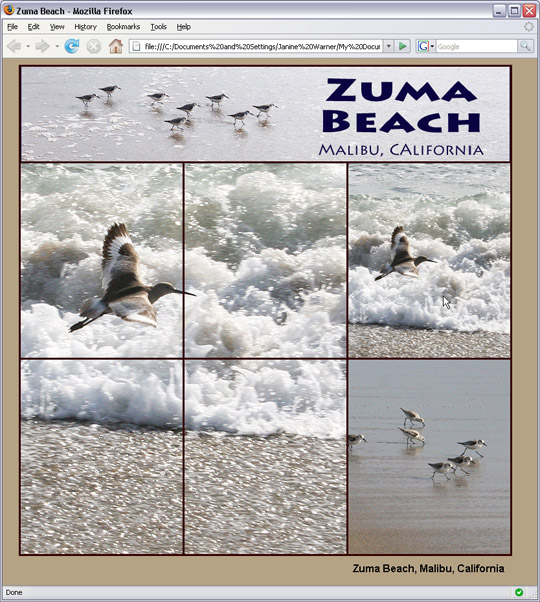
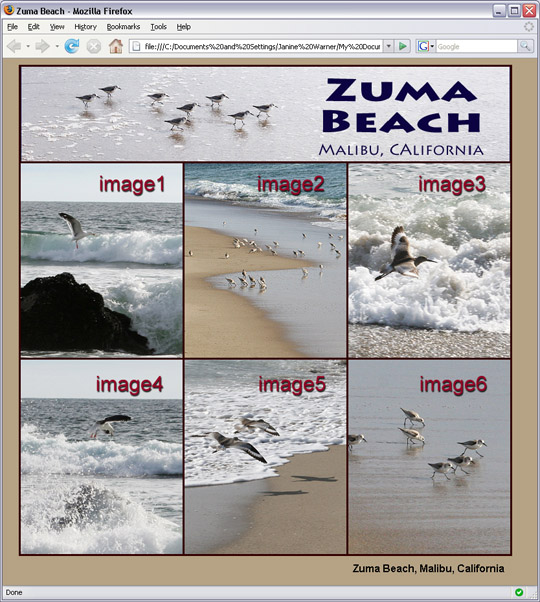
Before we start creating this design using Dreamweaver’s Swap-Image Behavior, let’s first take a look at the finished page so you can see what we’ll be doing before we get into the details. Notice in this screenshot that there are six different images positioned under the banner. Then notice in the two screenshots in the next step that when I roll my cursor over an image, other images in the design change. What’s happening behind the scenes is that the Swap Image Behavior is causing some images to be replaced by other images when my cursor rolls over a trigger image.
Tip for Template Users: If you are adding a swap image behavior to a page created from a DWT Dreamweaver Web Template, make sure to uncheck the Preload Image box described in the next paragraph before moving on to the next step.
In a DWT, the HTML body tag is not in an editable region where it can be changed in pages created from a template. Because the swap image behavior needs to be able to add the code “onload=”FP_preloadImgs….” to the body tag when you use the “Preload Images” option. This box is checked on default because preloading images can speed up the rollover experience, but it can cause you problems if you’re using .dwt templates. To solve the problem, simply uncheck the Preload Images box when you add the Dreamweaver Behavior swap images. (Unless the photos in your design are really large, you may not even notice a difference in load times, but you will be able to see the rollover effect you wanted to create in the first place.
STEP 2 Consider How to Images are Positioned
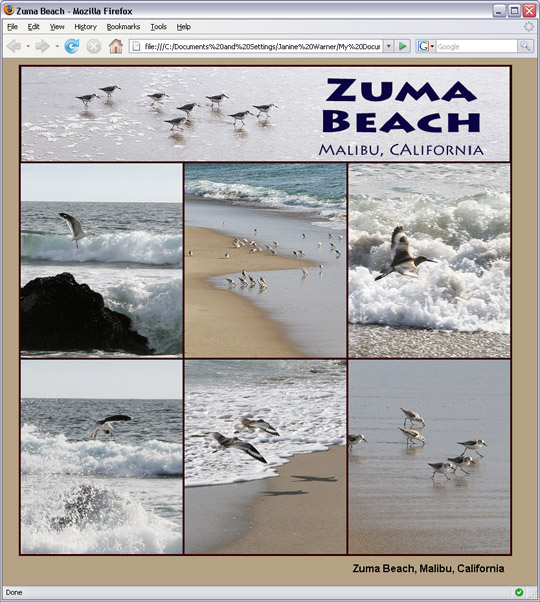
As you see in these screenshots, cut a larger version of each of these photos into four pieces and when a cursor rolls over one of the photos, I’m replacing four of the other photos with four separate images that make up a larger version of the trigger image. Note that when a cursor is rolled over one of the images in the middle of the page, I set the Swap Image Behavior to also move the trigger photo to the side so that it is visible when the four smaller image are displayed.

STEP 3 Create a Layout to Position Images
You can use the Swap Image Behavior to change images on any Web page no matter how the layout is created. In the design featured in this lesson, I’ve used a CSS layout creating a separate div for each photo and positioning the divs with CSS. You could also use an HTML Table or Dreamweaver’s Layers to create a similar layout. The instructions for using the Swap Image Behavior that follow will work exactly the same no matter how you create the layout.
STEP 4 Insert Images to Display on Page Load
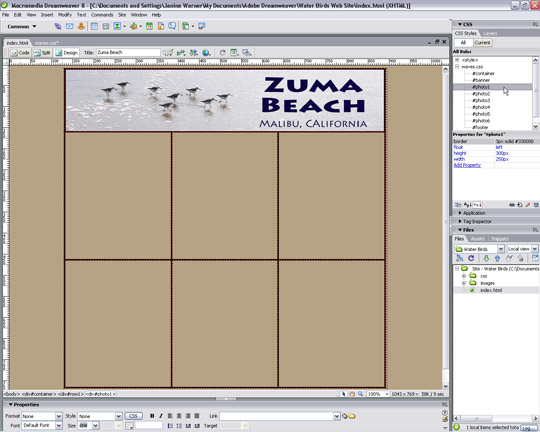
The first step is to insert all of the images you want to display when the page is first loaded in a browser. Once those images are in place, you can apply the Swap Image Action to any or all of the images and set up the Behavior to replace any or all of the images when that image is triggered. Note, the image shown here is a screenshot of the completed layout. I added the image numbers in red in Photoshop so you can see how I will number these images in the next step.
STEP 5 Name Your Images in the Property Inspector
In order to target your images with JavaScript, which is how Behaviors work, you first need to give each image a unique name. Here, I’m naming the middle image in the bottom row, entering “image5” in the Name field of the Property inspector. I’ve done the same for each of the other images, naming them image1 through image 6. Note: For best results, image names should differ from the names of their containers. Since I named the ID styles for each of the divs in this design #photo1, #photo2, etc., I named the photos, image1, image2, etc. to make them distinct.

STEP 6 Open the Behaviors Panel
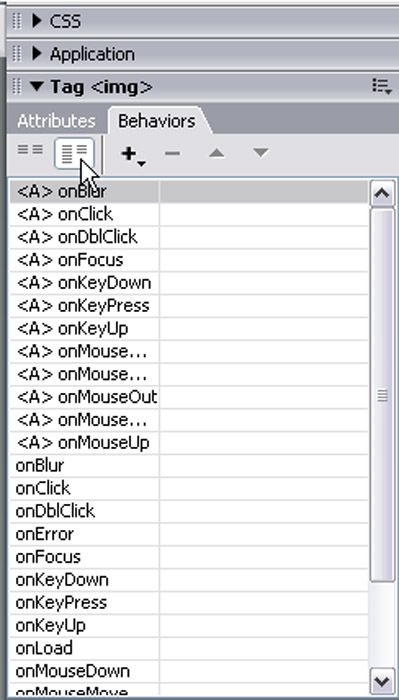
To open the Behaviors panel, choose Window > Behaviors. The Behaviors panel automatically opens in the right side of the work area, but you can move it by clicking and dragging it elsewhere on the page and you can expand it by clicking and dragging the top or bottom of the panel. You may also want to close some of the other panels to make room. You can display or hide Events by clicking on the Show All Events icon in the top left of the Behaviors panel. Note: Events that begin with an <A> are for elements that are linked.
STEP 7 Specify the Target Browser for Behaviors
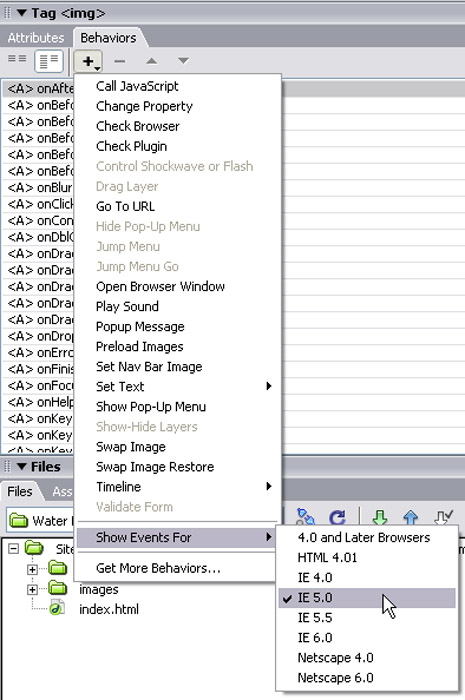
In the Behaviors panel, click on the Add Behavior arrow (just under the plus sign) and select Show Events For (second from the last at the bottom of the drop-down list). Then select a target browser. In this example, I’ve chosen IE 5. When you specify a target browser, you limit the Behaviors available to only those that will work in the selected browser and later versions. Behaviors that are not supported by that browser version will be grayed out and unavailable. Note: Behaviors may also be grayed out if they are not available for a selected element.
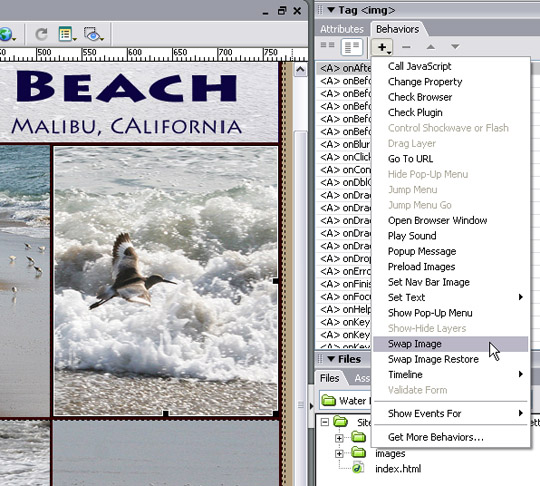
STEP 8 Select an Image and Choose Image Swap
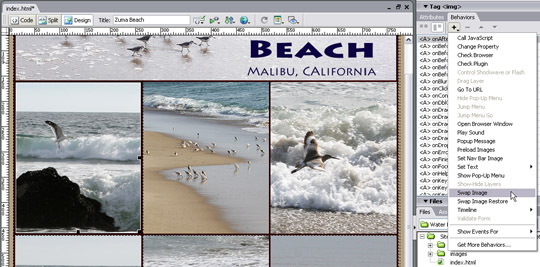
First click to select an image in the design area that will serve as the trigger for the Action. Then click on the Add Behavior arrow in the Behaviors panel to open the drop-down list of Actions and select the Action you want to apply. In this example, I’ve selected the image that I named image1 (the one at the top left in the first row of images) and choose the Swap Image Action from the list of Behaviors.
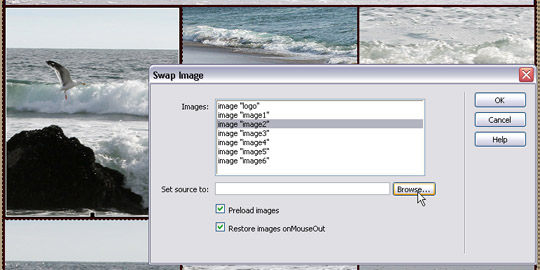
STEP 9 Specify Images to Swap
Next you’ll specify each image that will be replaced and identify the image it will be replaced with when the action is triggered. In this example, I’ve selected the photo of the seagull in the top left and I want the four photos to the right of it to be replaced with four other photos when a user rolls a cursor over the seagull image. To achieve this effect, I want to select each of images that I named image2, image3, image5, and image6 in the Swap Image dialog and then browse to find each of the four new images. (Refer to the screenshot in Step 4 for how I named the images).
STEP 10 Select Image to Swap
To fully understand how you match up the Swap Images, it helps to know how I’ve named my images. As you can see in my images folder, I have one image called seagull-250.jpg (that’s the image displayed in the top left). I also have four images named seagull-1.jpg, seagull-2.jpg, seagull-3.jpg, and seagull-4.jpg. These are the four images I want to “swap” for the images that are displayed on the page. With image2 selected in the Swap Image dialog, I want to choose seagull-1.jpg because I want it to display in where image2 currently appears on the page.

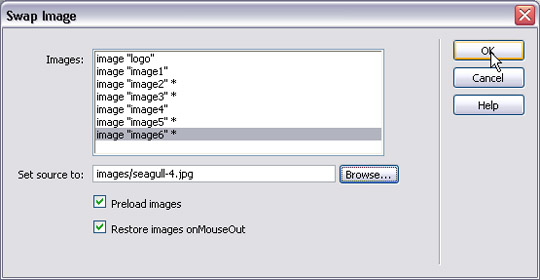
STEP 11 Select Additional Images to Swap
Continuing with this example, I want the photo named image3 replaced with seagull-2.jpg, image5 replaced with seagull-3.jpg, and image6 replaced with seagull-4.jpg and I want them all to be triggered by the same event. I’m skipping image4 because I don’t need to replace the photo in the bottom left corner. The asterisks indicate an image is set up to be replaced. Preload means all images are loaded when the page is loaded, and Restore Images on MouseOut means the originally displayed images will be replaced when the cursor is no longer over the trigger image.
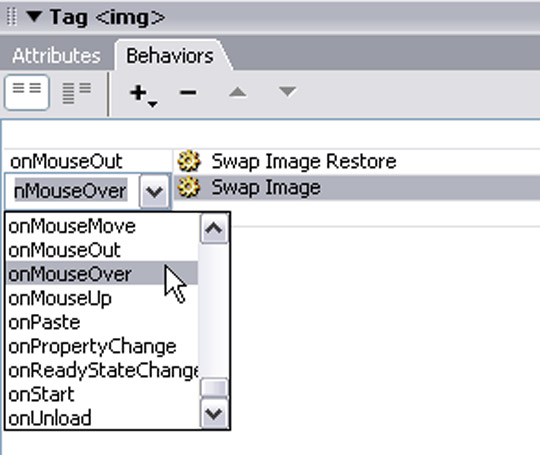
STEP 12 Specify an Event for the Behavior
Once the Action is applied, you can go back and specify the Event that will trigger the Action. By default, Dreamweaver applies the OnMouseOver Event when you use the Swap Image Action, but you can change that to any of the Events that are available. In this case, I’ll leave it set to OnMouseOver, but as you can see you have many other choices, including OnClick, which would require that the user click the image to trigger the Swap Image Action.
STEP 13 Apply Additional Behaviors
To apply the Swap Image Behavior to other images on a page, repeat steps 8 through 12, clicking to select the image you want as a trigger and then specifying the corresponding images that should be swapped. In this image, you can see that I’ve selected the photo that I named image3, and I’m once again choosing the Swap Image Behavior from the Behaviors panel. In this case, I’ll replace the images that I named image1, image2, image4, and image5 with the four images that make up the larger version of the trigger image.
STEP 14 Test Your Work in a Browser
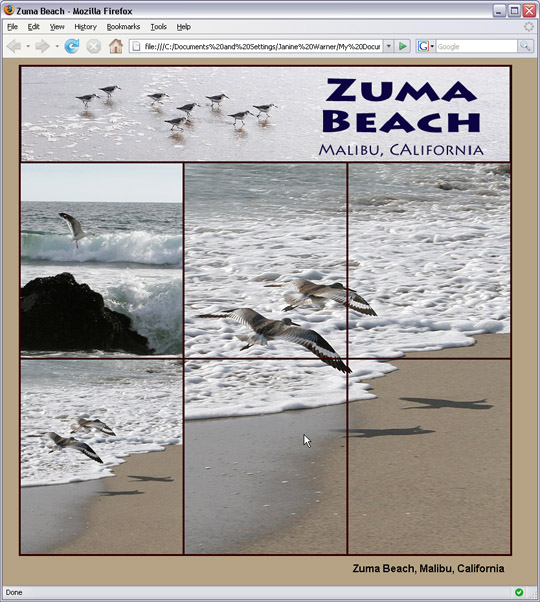
You won’t be able to see the effects of Behaviors like this one until you preview your page in a browser like Firefox. As you can see in this screenshot, I’ve rolled my cursor over the photo in the top right of the design to trigger the Swap Image Action which is replacing the four photos in the left of this design with four photos that combine to create a larger version of the trigger photo. Remember you can use the Swap Image Behavior to replace any or all of the images on a page to create your own designs.