
The Spry framework is a set of widgets Adobe added in version CS3. This collection of tools makes it easier to add advanced features, including e drop-down menus and collapsible panels.
These features are included in the Spry Insert bar at the top left of the workspace in Dreamweaver CS3 and in the Spry Insert panel at the top right in Dreamweaver CS4.
With Spry you can easily create features, which combine Cascading Style Sheets (CSS) and JavaScript to create drop-down menus and collasible panels that can be opened and closed without site users needing to reload a page.
STEP 1 Plan for Your Navigation Needs
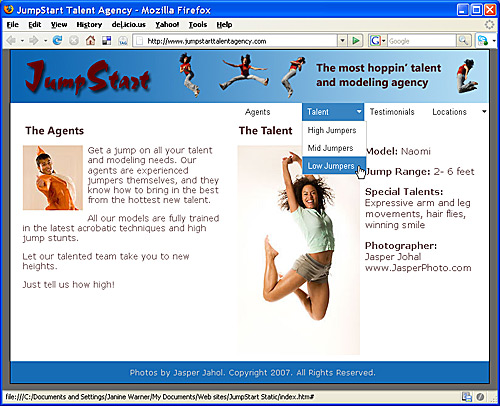
Even before you start creating a navigation menu like the one shown here, take some time to plan how best to organize the links and structure of your site. As a general rule, it’s good practice to limit the number of links in a navigation bar to no more than 6 or 7. As a result, many Web designers divide a site into a few main categories, and then further divide those into subcategories. For example, this site has a section called Talent, which serves as a main category, and then has subcategories for talent with different jumping skills.
Photos by Jasper Johal—www.jasperphoto.com
Follow the steps below to create a horizontal drop-down menu. You can also use these steps to create a vertical menu bar by selecting Vertical instead of Horizontal in Step 5.
STEP 2 Set Up Your Site
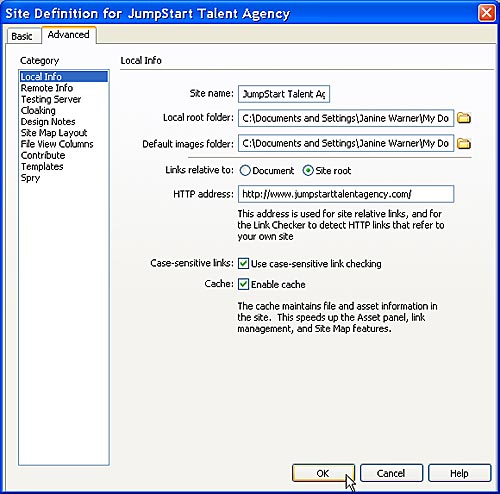
You can add a Spry menu to a new or existing page, but like most of the features in Dreamweaver, things works better when you’ve first defined your Web site in Dreamweaver. If you’ve already gone through the site setup process, you’re ready for step two. If you’re creating a new site, choose Site > New Site, select the Advanced tab and fill in the fields in the Local Info category. For more detailed instructions, read the online tutorial Defining a Site in Dreamweaver.
STEP 3 Create a New Page or Open an Existing One
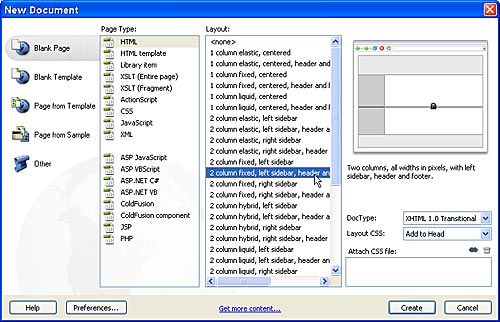
To create a new page, choose File > New and then select a file type. In the New Document Window, you can choose from a variety of file types, including ASP, PHP, and CFM. If you’re creating a new page for a basic, static Web site, choose Blank Page, HTML, and then select a CSS Layout or choose None to create a completely blank page. If you choose one of the CSS Layouts, you can alter the layout to better suit your design by editing the CSS definitions. (You’ll find tips for editing CSS layouts like this one in this Dreamweaver tutorial.)
STEP 4 Insert Spry Navigation Menu
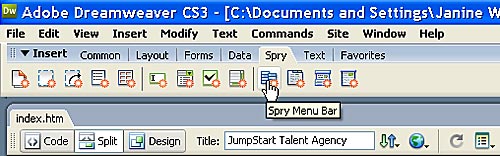
To insert a Spry menu, first open the Spry Insert Bar at the top of the workspace by clicking on the Spry Tab, or choosing Spry from the Insert Bar drop-down list. Place your cursor where you want to create the menu in your Web page, and then click on the Spry Menu Bar icon.
[
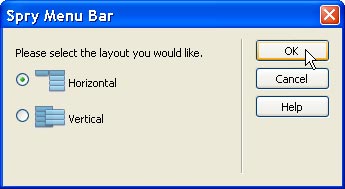
STEP 5 Choose Horizontal or Vertical
You can use the Spry Menu Bar option to create a menu that displays horizontally across your page with sub-menu options that drop-down below the menu bar. Or you can create a Vertical Menu Bar with sub-menu options that open to the right of the main menu items. Make your selection by clicking on the corresponding radio button and then click OK to insert a generic menu bar into the page. Once the menu bar is inserted, you can customize it by changing the text, colors, fonts, and other options.
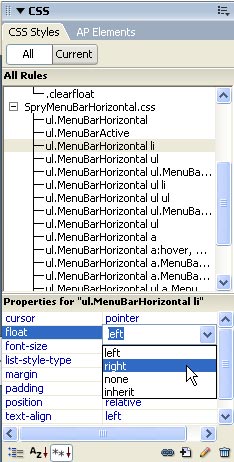
STEP 6 Adjust Alignment
The format of a Spry menu is controlled by CSS. When your page with is saved Dreamweaver automatically creates a new CSS file and saves it in a new folder it created named”SpryAssets.” That folder is really important, don’t rename and make sure you upload it when you publish your files. It contains the CSS style sheet and other files required for yourSpry menu item.
Thus, to alter the appearance, you need to edit the CSS definitions in that CSS file. By default, the horizontal menu aligns to the left of the page, but you can easily align it to the right instead by changing the definition of the corresponding style. To change the alignment, you’ll need to change the Float setting. Start by selecting the style named: ul.MenuBarHorizontal li in the CSS Panel and in the Properties pane below it, click just to the right of the Float field and use the drop-down list to select right instead of left.
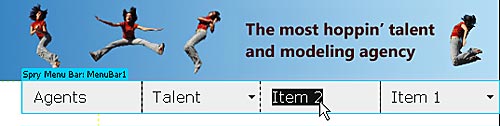
STEP 7 Replace Main Text
When a menu bar is inserted, Dreamweaver populates it with placeholder text: Item 1, Item 2, etc. To add your own text, simply click and drag to select the text within each navigation box and then type over it to replace it with the word or words you want to use instead. In this figure, you see that I’ve replaced Item 1 with Agents, and Item 2 with Talent, and I have selected Item 3. You can also edit menu items using the Property inspector as you see in the next step.
STEP 8 Displaying Spry Menu Options in the Property Inspector
To edit the text in the submenus, or to add or remove menu items, you need to first display the Spry menu options in the Property inspector. To make these options visible, click on the blue tab at the top left of the Spry menu that you inserted into the page. In this example, it’s labeled Spry Menu Bar: Menu Bar 1. When you click on the menu tab, the Property inspector displays the corresponding Spry options.

STEP 9 Edit Submenu Text
With the Spry menu options open in the Property inspector at the bottom of the work area, you can edit the submenu text by first selecting the menu item in the left-most menu field, and then selecting the submenu item in the middle menu field. You can edit the text of any selected item in the Text field at the far right of the inspector. As you see in this example, Item 1.1 has been replaced with LA Office, Item 1.2 with NY Office, and Item 1.3 is selected so that the text can be edited in the Text field.

STEP 10 Add or Remove Menus and Submenus
You can add menu or submenu items by selecting any item listed in the Property inspector and then clicking on the plus (+) sign at the top of the corresponding menu field. To remove a menu item, select it and click the minus (-) sign. For example, you can add a third level menu item by selecting a submenu item and then clicking the plus sign above the third menu field. In this figure, a third-level submenu item, Manhattan, is being added to the submenu item NY Office, which is a submenu item of Locations.

STEP 11 Creating and Editing Links
A menu bar, by design, should include links to the main sections and subsections of a Web site. To turn any menu item into a link, select the item in the Property inspector and enter the URL in the Link field. You can also use the browse button (hint: it looks like a yellow file folder) to locate and select any file in a Web site and set the link automatically. If you are setting a link to a top-level menu item, you can also select the text in the main workspace and set the link in the Property inspector.

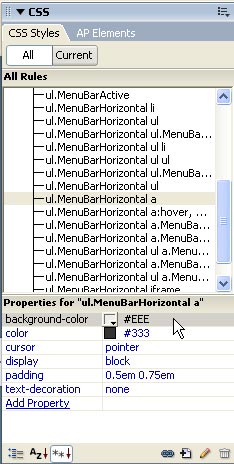
STEP 12 Change Text and Background Colors
To edit the text and background colors in a Spry menu, you must edit the corresponding styles. The tricky part is that the style definitions for text and background colors are included in the link styles, which have multiple states. For example, the style named: ul.MenuBarHorizontal a, defines the background and text color that display when a link is first loaded by a browser. However, if you want to change the text or background color that appear when a visitor rolls a cursor over a link, you’ll need to change the definition for the style named: ul.MenuBarHorizontal a:hover, ul.MenuBarHorizontal a:focus.
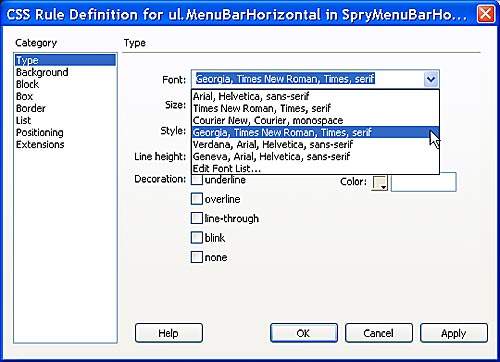
STEP 13 Change the Font Face or Style
By default, the font in a Spry menu is the same as the page font. Thus, if you’ve created a Body style to specify that the page font as Verdana, the Spry menu text will also display in Verdana. If you want to change the font used in the menu without altering the page font, you can add a font definition to the style named: ul.MenuBarHorizontal. To do so, double click on the style name in the CSS Panel and in the CSS Rule Definition dialog, enter a font face or choose a Font collection from the Font drop-down.
STEP 14 Preview in a Browser to Test
To test a Spry menu, you’ll need to preview your page in a Web browser, such as Safari or Firefox. Just click on a menu or submenu item to see the drop-down items in action and test the links. Beware, that if you have to levels of submenus on the right side of the screen, as you see in this example, they may extend beyond the page display area.
