Before you do anything in Dreamweaver, make sure you “set up” the site you want to work on using the Manage Sites features. Once you’ve set up a web site, Dreamweaver keeps track of the files, which makes it easier to edit existing sites, as well create new ones.
The setup process is streamlined in Dreamweaver CS5 so there are only two quick steps — and that makes this tutorial short and sweet if you just want to get going quickly.
In these written and video tutorials, you’ll find tips on how to get started, how to set up an images folder, and how to configure a web server.
Watch video or continue with the written tutorial below
Order Janine’s Complete Video Training in Dreamweaver and CSS
Continued…
Step 1. THE NEW, SIMPLER, SITE SETUP PROCESS IN DREAMWEAVER CS5
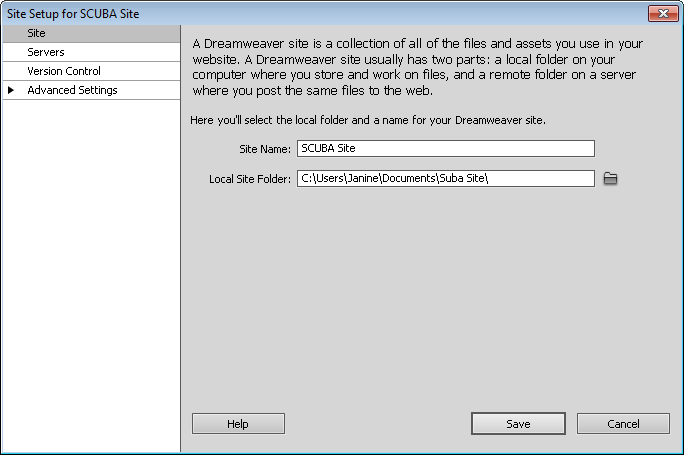
In version CS5, Adobe streamlined the Site Setup process. When you first start working on any new or existing site in Dreamweaver, it’s important to begin by setting up the site and identifying your main web site folder. The new Site Setup dialog requires just two settings to get started. First, give your site a name (any name will do, it’s just for your reference). Next, click the small folder icon to the right of the Local Site Folder field and select the folder on your hard drive where you will store all of the files and subfolders in your site. Click Save and you’re done.
Step 2. SETTING UP MULTIPLE WEB SERVERS (LOCAL AND REMOTE)
Use the tabs on the left of the new Site Setup dialog to access more advanced features and FTP settings. The new dialog now makes it possible to set up multiple servers for any site, a great way to manage both a testing server and a live server for the same Web site. Note that you need to click the small plus sign at the bottom of the server category window to open the FTP settings dialog.

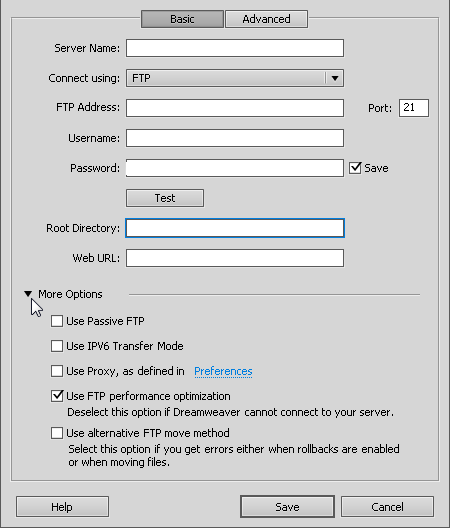
3. ADVANCED SERVER OPTIONS
When you set up the ftp features in Dreamweaver, you can use the Advanced tab and the More Options menu to access additional settings and features for interacting with any Web server.
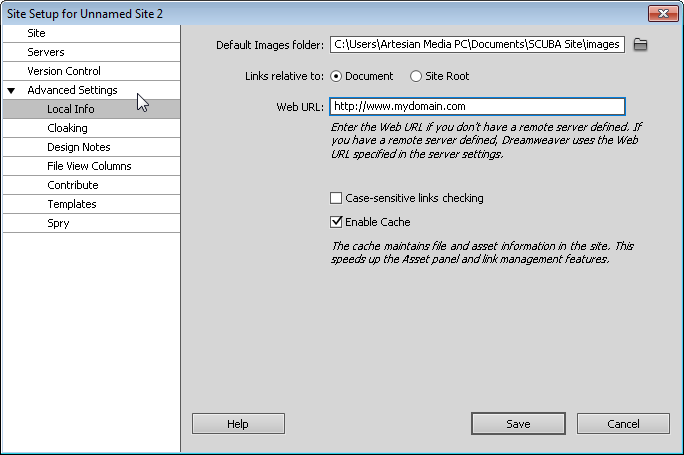
4. SET UP AN IMAGES FOLDER AND CONFIGURE ADVANCED OPTIONS BY CLICKING ON THE ADVANCED SETTINGS CATEGORY
You’ll find many other options in the Site Setup dialog when you click the Advanced tab, including the setting for an images folder in your local site folder. If you identify an images folder, and then insert an image into a page that is outside your root folder, Dreamweaver will copy the image into the folder you identify in this field.
You can also use the Advanced options to specify a folder for Spry assets, set up version control, cloaking, Contribute, and other advanced features.