Dreamweaver can insert Flash video (.flv) files, as well as Flash files with the .swf extension. In the last issue, I used Dreamweaver to add Flash video to a Web page. In this tutorial, you learn to insert Flash files with the .swf extension. The process is similar to inserting an image file, but Dreamweaver has more settings for Flash.
Step 1 Create or Acquire a Flash File
For this lesson, I assume you already have a completed Flash file (in the .swf format), and you want to add it to your Web page using Dreamweaver. To create a Flash file, like the Turtle Puzzle game I’m using in this tutorial, you’ll need Adobe Flash or a similar program that supports the Flash format. Because Flash is an open standard, you can create Flash files with a variety of programs, including Adobe Photoshop Elements, which uses the Flash format to save automatically generated Web galleries.

—PHOTO CREDIT—Ken Riddick
Tip for Template Users
If you are adding a Flash video or animation to a page created from a .dwt Dreamweaver Web Template, you may run into trouble if your template doesn’t have an editable region in the head area of the page. If you ever receive an error message like: “you don’t have permission to change that part of the template,” you need to update your template before moving on to the next step.
If you’ve created your templates in Dreamweaver version CS4 or later, you probably won’t have this problem, but you’ll know write away if you do have the problem because as soon as you try to add a Flash file you’ll get the error message. To make sure your templates will work with Flash files , follow the instructions in my Dreamweaver FAQ and then come back and you can complete this tutorial. (As you’ll see, you’re not the only one who’s had this problem.)
STEP 2 Save it into Your Root Folder
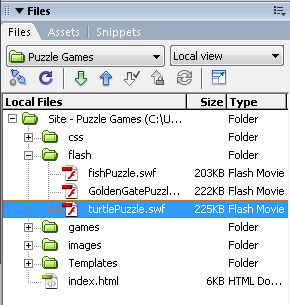
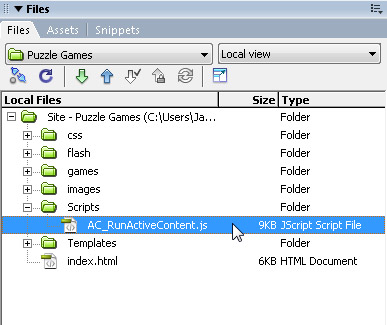
Before you start, make sure to move or save the Flash file into your root site folder. If you prefer, you can create a subfolder to store your Flash files. If you’re not sure what a root folder is or how to define a root folder in Dreamweaver, refer to my online tutorial: “Defining a Site in Dreamweaver” on the Layers Magazine Web Site. Defining a site enables you to manage files and folders without breaking links, using Dreamweaver’s File panel, shown here.
STEP 3 Open or Create a New Page
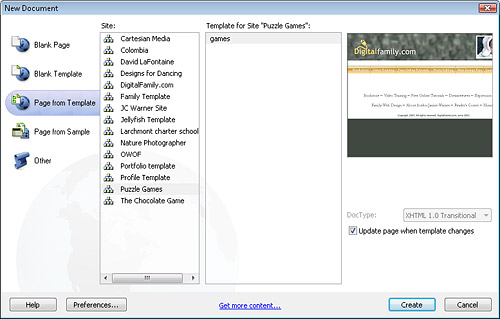
To add a Flash file to a Web page, open an existing page or create a new document by choosing File>New and specifying the file type in the New document window. In this example, I’m creating a new page from a Dreamweaver template. You can add a Flash file to any Web page. Either way, it’s always good practice to save a new page before inserting a Flash file.
STEP 4 Use the Insert Flash Option
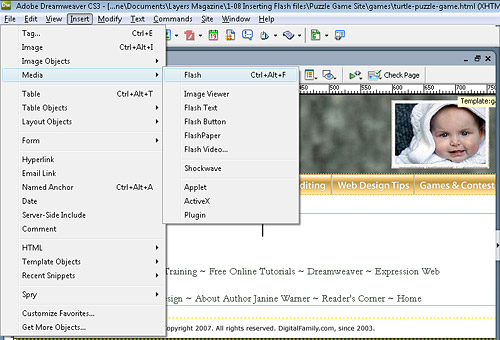
Click to insert the cursor where you want the Flash file to appear on your Web page and choose Insert>Media>Flash. Alternatively, you can use the Insert Media button from the Common Insert bar at the top of the Dreamweaver workspace.
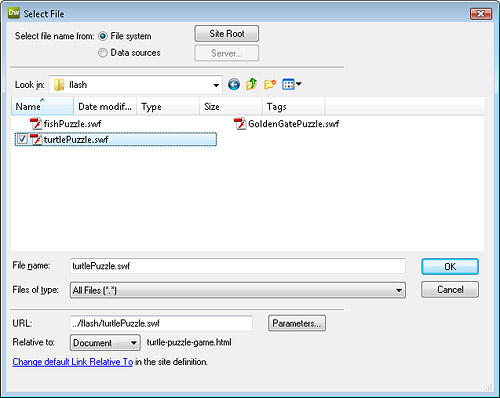
STEP 5 Locate the Flash File
In the Select File dialog, browse your drive to locate the Flash file that you want to insert in your page and double click to select the file.
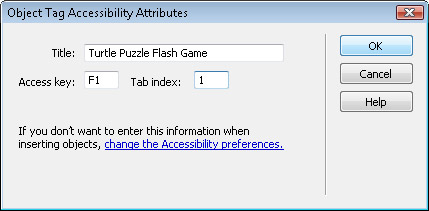
STEP 6 Set Accessibility Options
If you have accessibility options turned on, you will be prompted to add alternative text. Enter a short text description of the Flash file. Use the Tab index and Access key options to include a key command to start or control the Flash file if you want to provide an alternative to those with accessibility challenges. Click OK and the dialog box closes and the Flash file is inserted into your page.
STEP 7 Specify Flash Settings
Dreamweaver displays Flash as a solid, gray box with the dimensions of the Flash file. Click on the gray box to display the Flash options in the Property inspector at the bottom of the workspace and, as you learn in the following steps, you can use these options to alter the size and the way the Flash file is displayed on your page. Pressing the Edit button will open the file in the Flash program (if you have the program on your hard drive).

STEP 8 Preview with the Play Button
Click on the Play button in the Property inspector to play the Flash file. In this example, the Flash file is a puzzle game so pressing the Play button displays the game options and images. (Note: When the Play button has been activated the button text changes to Stop.)

STEP 9 Test the Flash File
When the Play button is pressed all of the features of a Flash file are activated using the Flash Player just as they would be if the file was displayed in a Web browser. As you can see here, I’m testing this Flash puzzle game by clicking and dragging to move the pieces into place.

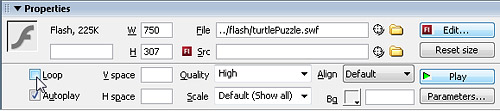
STEP 10 Adjust Loop and Autoplay Settings
You can make a number of adjustments to the way a Flash file displays by changing the settings in the Property inspector. Check the box next to loop to set the file to replay continuously, uncheck the box if you want the file to play only once. Checking Autoplay causes the file to begin to play as soon as the page is loaded into a browser.
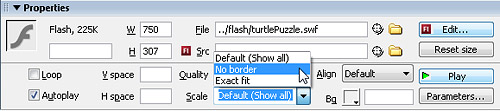
STEP 11 Specify Other Options
Change the Scale settings to specify if the Flash file will have a border. Use the Quality settings to control the file quality that will be displayed. Note that the higher the quality, the longer it will take to download.
STEP 12 Upload the Scripts Folder
When you insert a Flash file like I have in this tutorial, Dreamweaver automatically creates a script file to accompany it and saves it in a folder called Scripts. Make sure to upload the entire Scripts folder when you publish your Flash file and Web page to your server or it may not display properly.
STEP 13 Preview in a Browser
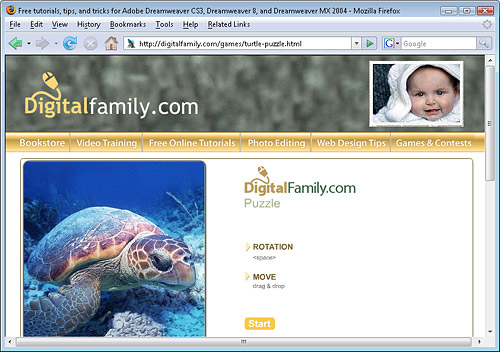
It’s always good practice to preview your work in a Web browser after you upload it. You can also preview your pages in a browser on your local hard drive. And here’s a tip: when you preview a page with a Flash file and the JavaScript locally, Internet Explorer treats the script as a potential threat on your hard drive and prompts you with a security warning in the Information bar. This should not happen when the page is published and viewed online in Internet Explorer, and Firefox, shown here, does not use a security prompt with Flash.