
The simplest and quickest option if you want to sell only a few products or services on your Web site is to create a PayPal button for each item you want to sell. Follow these steps:
1. Open your browser and navigate to www.paypal.com.
If you have a PayPal account, log in here. If you don’t have an account, click on the Sign Up link to establish an account, and follow PayPal’s easy online instructions. Depending on what level of account you want to sign up for, you will need a valid credit card and your merchant account information handy.
2. Click on the Merchant Services tab.
A page will open with many links to all the various actions you can take with your PayPal account, as well as links to various resources to help you run your online business.
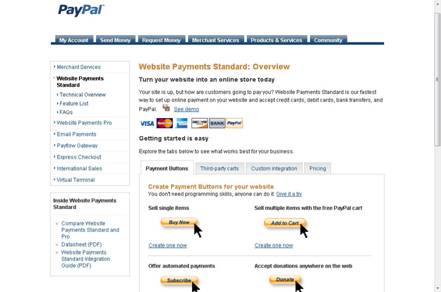
3. Click on the Website Payments Standard link in the box on the left side of the page.
The Website Payments Standard: Overview page opens (see Figure 11-8). This page allows you to choose from a couple other options, but for now, stick with creating a button for just one item at a time. PayPal also offers a Website Payments Pro service, but this requires that you register for a business account with PayPal and that you use an integrated shopping cart or build one with PayPal’s APIs.
4. Below the Sell Single Items heading, click the Create One Now link.
The Create PayPal Payment Button page opens with fields in it for the description of your item.
5. Below Choose a button type, choose Buy Now from the drop-down list.
You can also create a payment button to sell your services, set up a subscription or recurring billing process, collect a donation, or buy a gift certificate. In this example, we make a simple button to sell one item.
6. Type the item name in the Item Name field.
The optional Item ID field allows you to enter a tracking code for the item you’re selling, if you want to use that number in your spreadsheets or inventory programs.
7. In the Shipping section, fill in the amount you charge for the shipping and handling of your item.
8. In the Tax section, fill in the amount of sales tax and other applicable taxes you charge.
9. Choose how you want to be notified when someone has bought your item.
You can be notified through your secure merchant account. If you select this option, your e-mail address doesn’t appear in the button’s HTML code. This may or may not be important to you. Some merchants want to appear as transparent and open as possible; others are afraid of having their e-mail inboxes overflow with spam.
If you choose to use your PayPal e-mail address, you receive a notification in your e-mail inbox every time someone buys something from you with this PayPal button.
10. Click the Create Button button.
The You’ve Created Your Button page opens. In a panel in the middle of the page is the code for your PayPal button. Don’t worry that the code looks like a lot of gobbledygook. You don’t have to type this in anywhere.
11. Click the Select Code button to select the button code.
The code is highlighted.
12. Press Ctrl+C (on a Mac, @@cmd+C) to copy the code using whatever tool you prefer to create your Web site, just make sure you copy the code into the HTML code of the page to make this work.