Halftone effect is a very popular one that you can see used very often. Luckily, in Photoshop you can apply this effect, halftone pattern filter, on a picture rather easily and this tutorial will not only show you how to use the halftone filter, but also shows what can you do with it.
01. First open a picture you’d wish to add the filter on. It can be any picture of any color or size.

02. Duplicate your current layer by right clicking on the original and choosing Duplicate layer.

03. Make sure black is your foreground and white, background color. Whichever colors you choose, will be used in the filter, so colors are very important. This tutorial will concentrate on the black and white shades but you can go for something more colorful.

04. Now go to Filter – Filter Gallery and choose Halftone Pattern under the Sketch. If you are working with Photoshop CS5 or older, then go to Filter – Sketch – Halftone Pattern. A new window will open. There you have three options to change – size, that determines the size of the dots, Contrast, that determines how strong are the lighter and darker parts and you can also choose the Pattern type. Press OK, when you are ok with your results.

05. Now create a new layer by going to Layer – New – Layer.

06. Take the Paint Bucket tool, choose the color gray and fill the empty layer with the color.

07. Then go to Filter – Texture – Texturizer (or Filter – Filter Gallery in Photoshop CS6) and add that gray color a bit of a texture. Press OK.

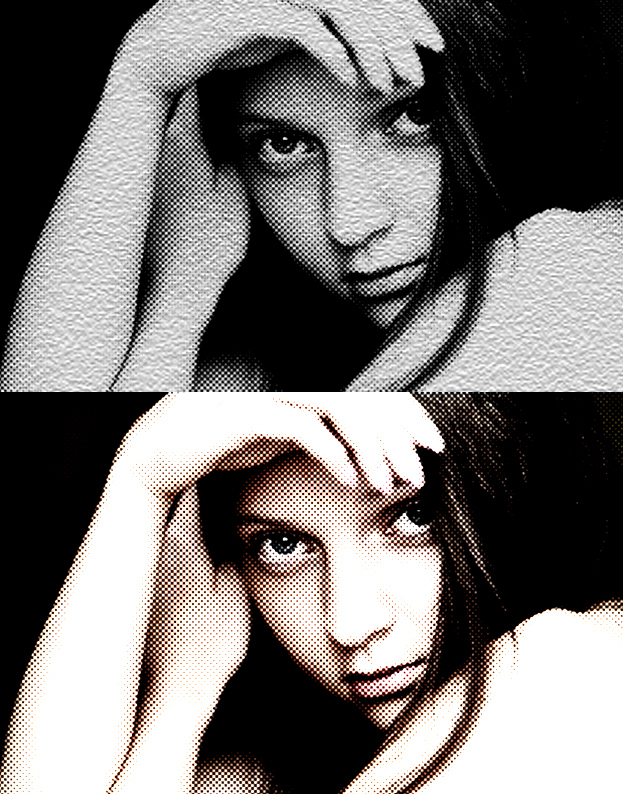
08. Now set that gray layer to Screen from the layers panel. And this is one effect that you can get from using the Halftone Pattern Filter.

09. You can get many results by using the blend modes and blending the original with the halftone picture or something else. Either way, the results are interesting and worth a try.
