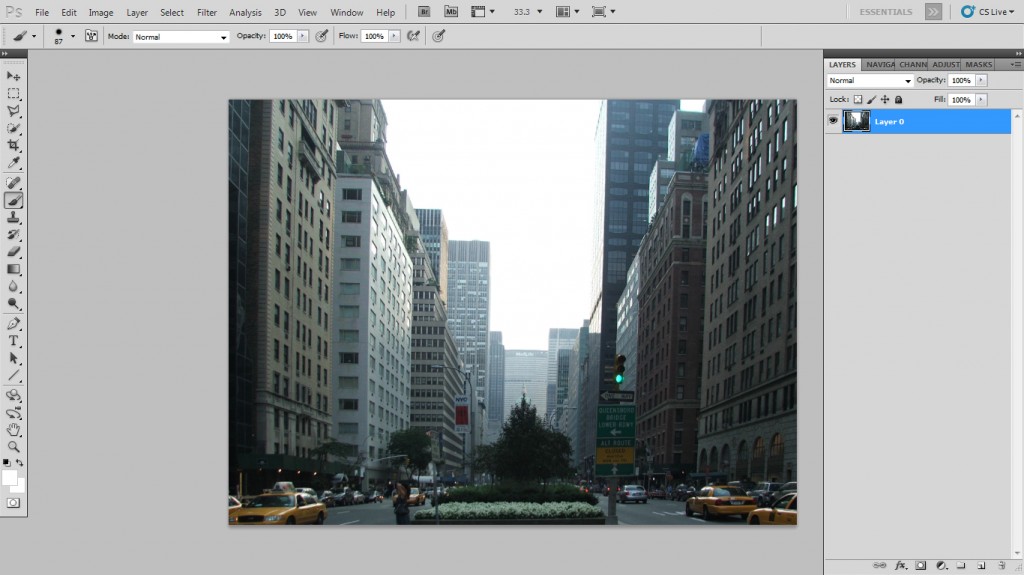
Usually when you make a photo with a wide angle lens , they tend to create a fisheye effect that isn`t appreciated by all. Not all wide lenses create fisheye effect , but they tend to distort the original perspective
With this tutorial I will show you how to remove this effect or how to make it more agreeable.
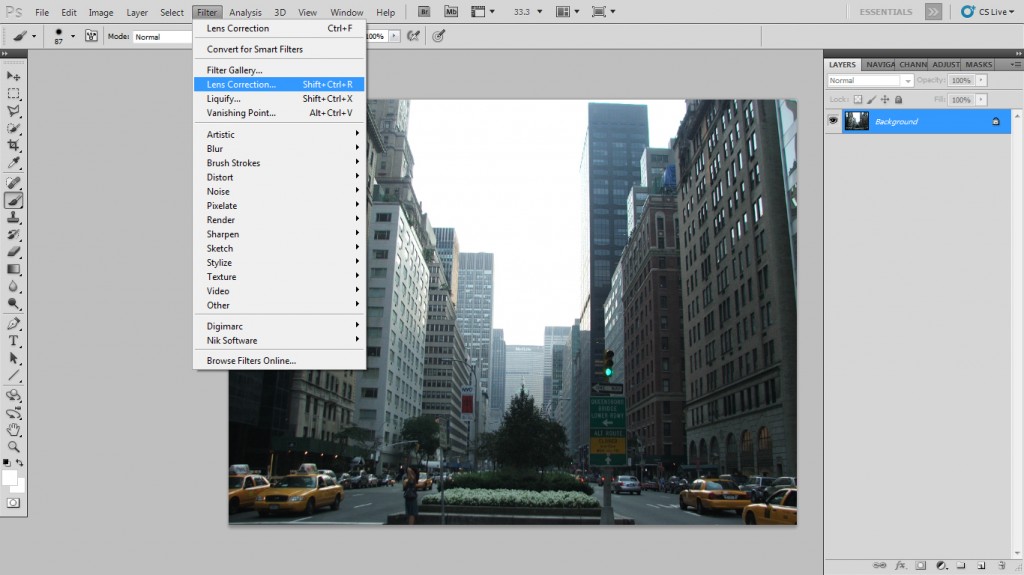
First of all you have to open the desired photo.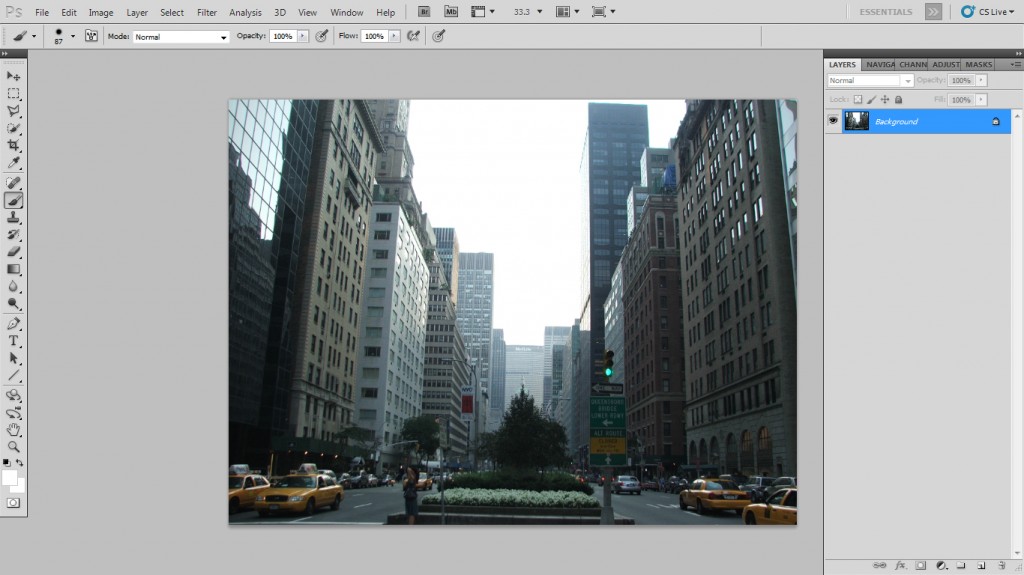
From the top menu go to Filter – Lens Correction. This is the tool that will mainly make all the magic.
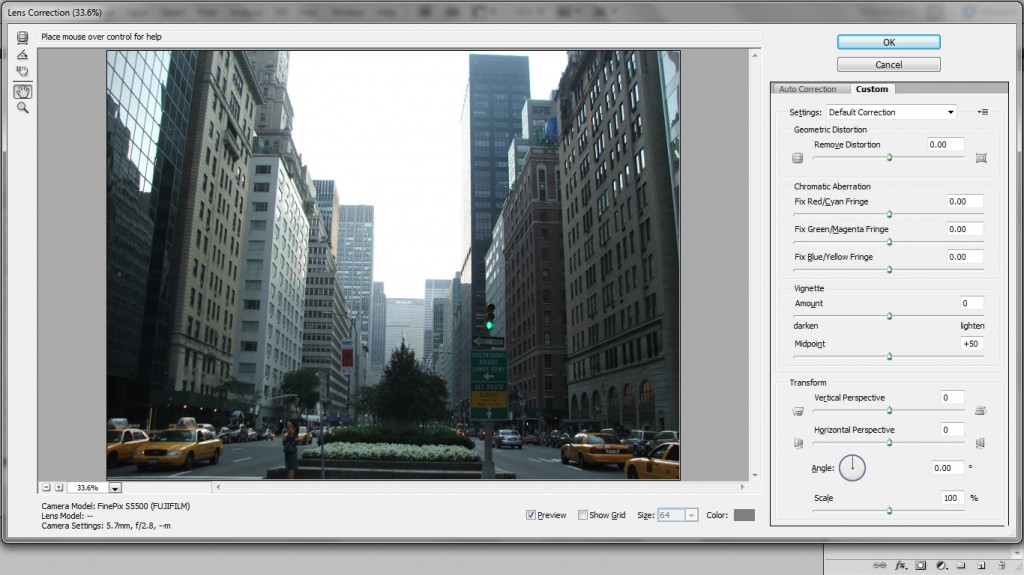
A new popup window will show up. On the right side you have the settings. Change from the top tab to Custom.
You could use the grid by checking the box near the Show Grid text. If you could tell what is straight and what it`s not you should not use it because you have to deactivate it to see how it look after every modification.
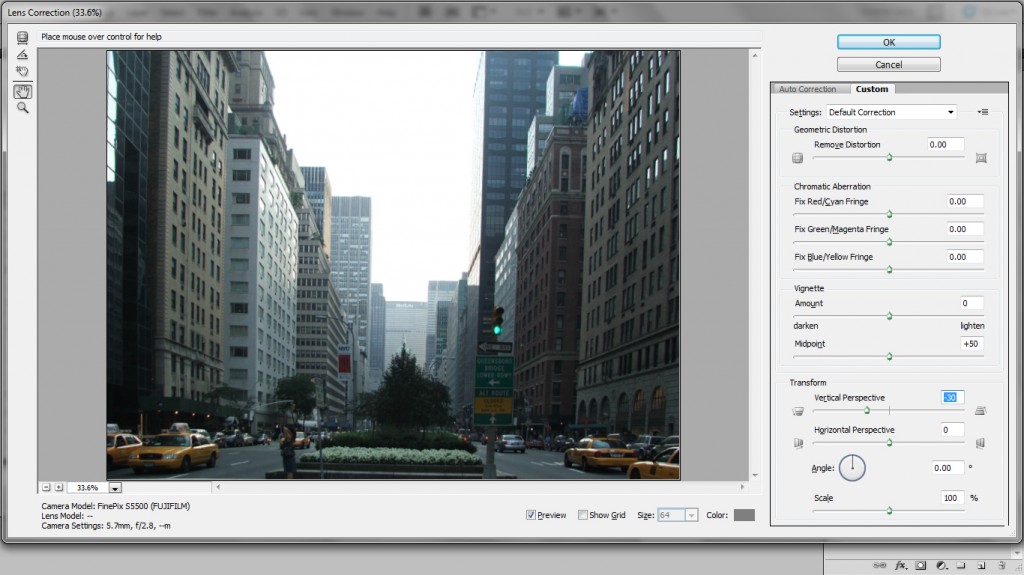
You can clearly see that the Vertical perspective is wrong and you have to adjust it. The buildings that point to the center of the image indicate that the Vertical perspective is wrong. On other situations , you should take a mark that you know that should be straight and watch how it modifies. You will probably not manage to make it straight , but change slightly the settings until is good.
Drag the Vertical Perspective cursor to -30 and the photo will be fine from this perspective.
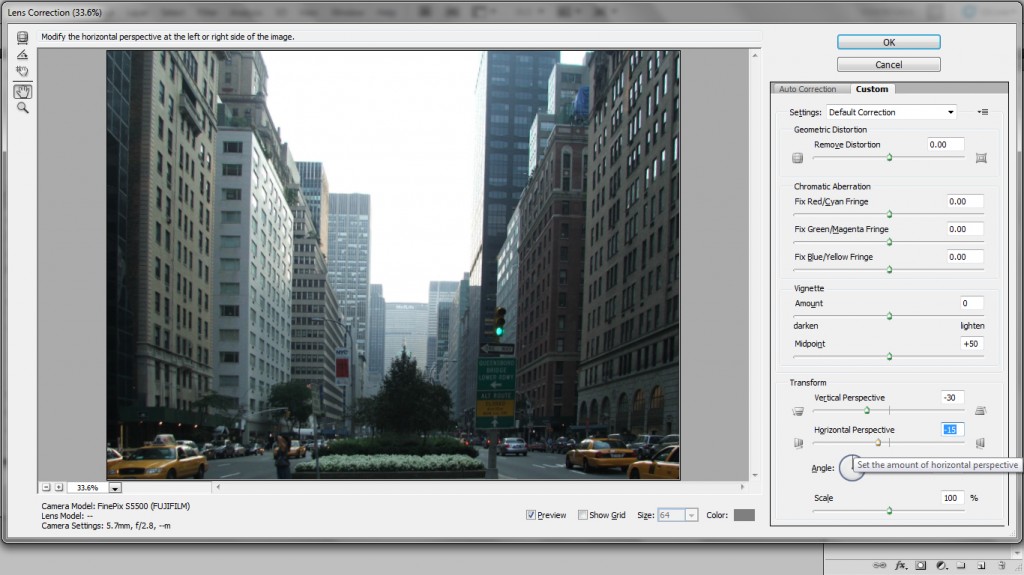
Next on the list is the Horizontal perspective. This would have to make the bottom signs to stay straight horizontally. The signs are your point of reference. On other images you could take as reference the skyline or a road or something that you know that should be almost horizontally.
Drag the Horizontal Perspective cursor to -15 and that will do the job.
We finished the work in this workflow so click OK to return to the main screen.
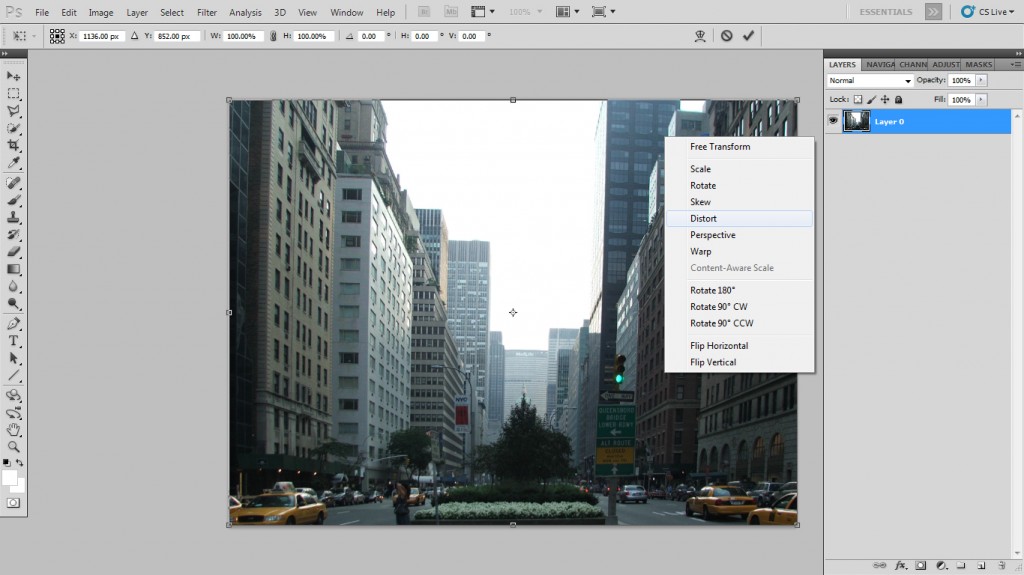
For the next step you have to use the Free Transform tool. Simply press CTRL + SHIFT + T and this will bring up the tool.
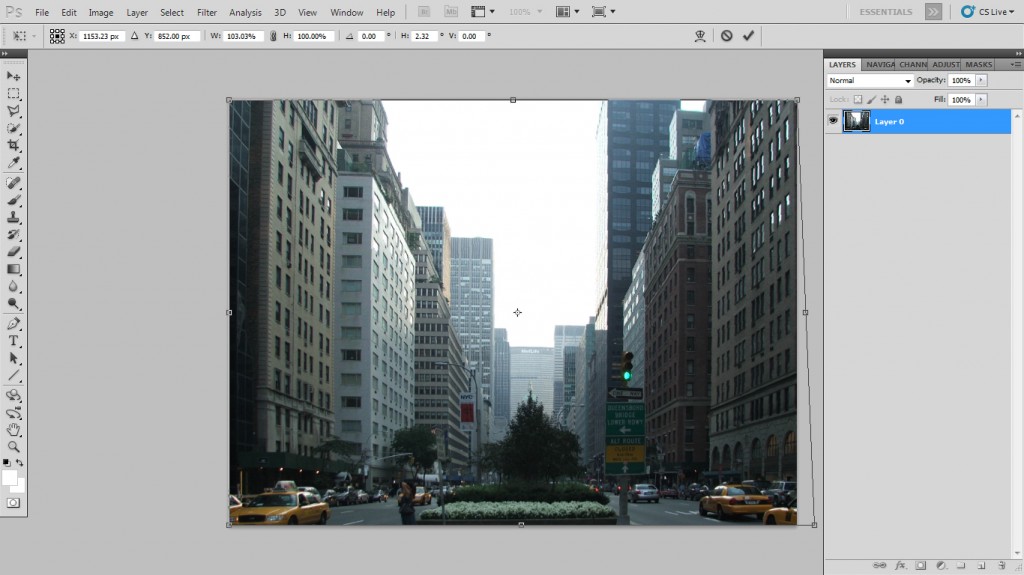
Right click on the image and select Distort for the mode. Distort is preferred because it let you change individually the left and the right side of the image. You can use even Warp if you want to correct only certain areas.
Drag the right bottom corner a little until the buildings from the right side are straight.
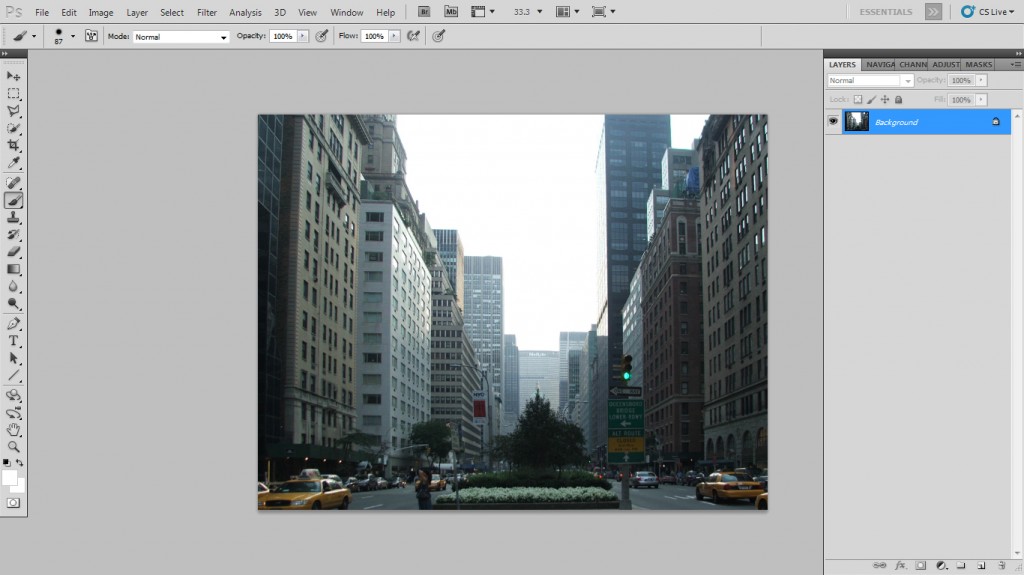
Now the photo is straight and the perspective is right.
PS: This tutorial is made for this photo , but it will work for any other photo. The only thing you have to do is to take some reference points that you know that they should be straight.
For the first photos I recommend you to use the grid so you can see the offset of the image. After few images you will know how to correct appreciate it.
