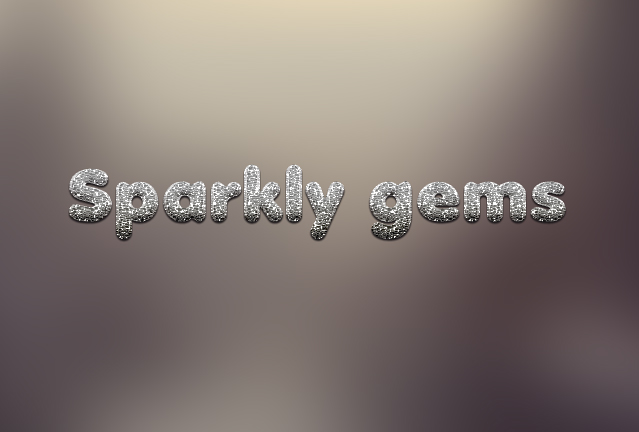
Cool Sparkle Gem Text Effect in Adobe Photoshop
This tutorial will show you how to create a cool sparkle gem effect that you can add to any text or shapes. The tutorial is simple and requires little Photoshop skills.
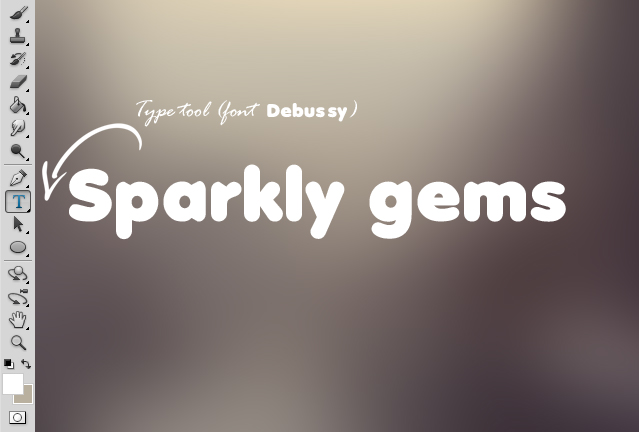
01. Lets start out by creating a new document, fill the background with any color or picture and select the Type tool. Now choose a nice and bold font and type your word. In this tutorial Debussy font is used.
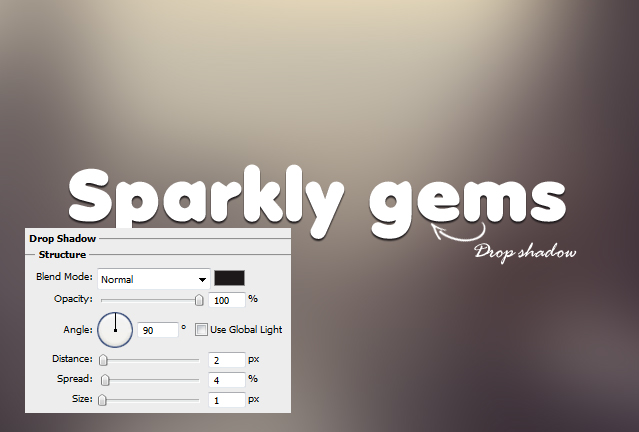
02. Now go to the menu and select Layer > Layer Styles > Drop Shadow. A new window will open. Now add the values below to get a small shadow under your text. Do not press Ok til the end of the tutorial since we’ll be staying in the layers styles a bit longer.
03. Go to Satin tab (click on the text on the left side of the window) and add the values below.

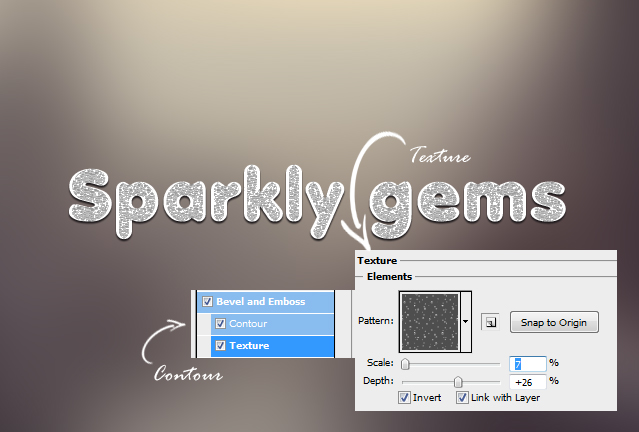
04. Now check the Contour check box and go inside the Texture. There add a grainy texture and set the values shown below.
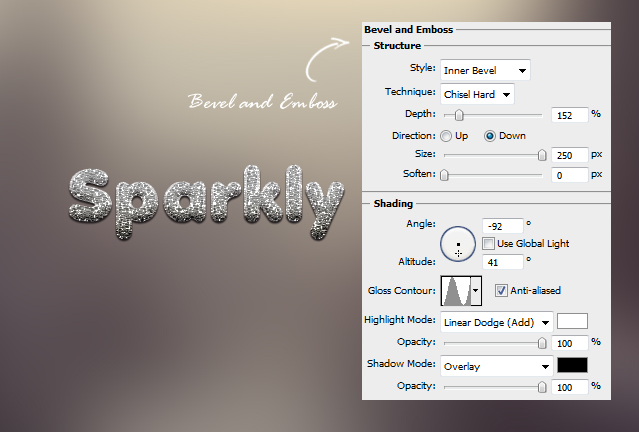
05. Go to Bevel and Emboss and add some more values. This will make your text be more round and 3D looking.
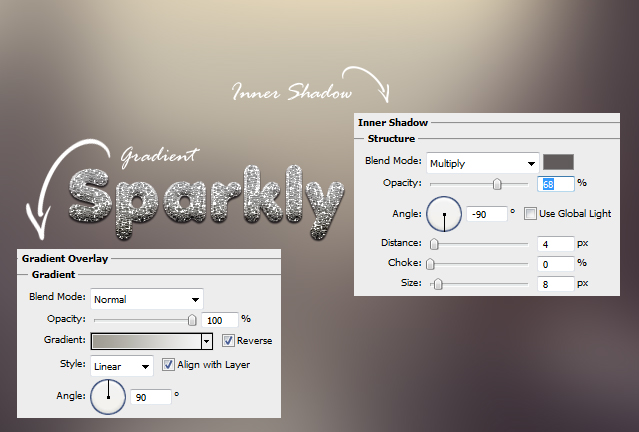
06. Go to Gradient Overlay tab to give the text some shades and then add even more shade under Inner Shadow tab. You can press OK now.
07. And your sparkle gem style is ready to shine!