Ever thought of how your name looks in cool graffiti text? This tutorial will show how to create a cool graffiti text style in Photoshop.
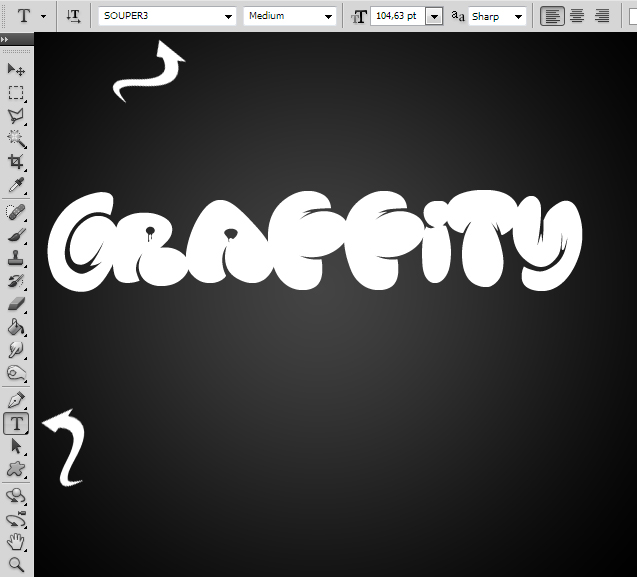
01. Open a new document and fill it with darker color, gradient or picture. Then take the Type tool and write your word. Keep in mind that in graffiti style, the font is very important. It should be bold and somewhat artistic. This tutorial uses Souper 3 font, but you can find something that you like the best.
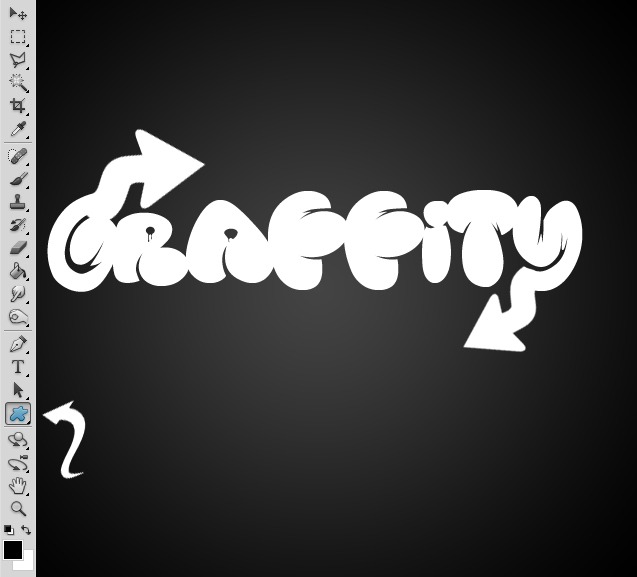
02. Make the font more interesting by adding some shapes on it. Select the Custom Shape tool, choose your shape and start adding some shapes. Now select all the layers (shape and text layer, NOT the background) and press Ctrl (Command) + E to merge them into one.
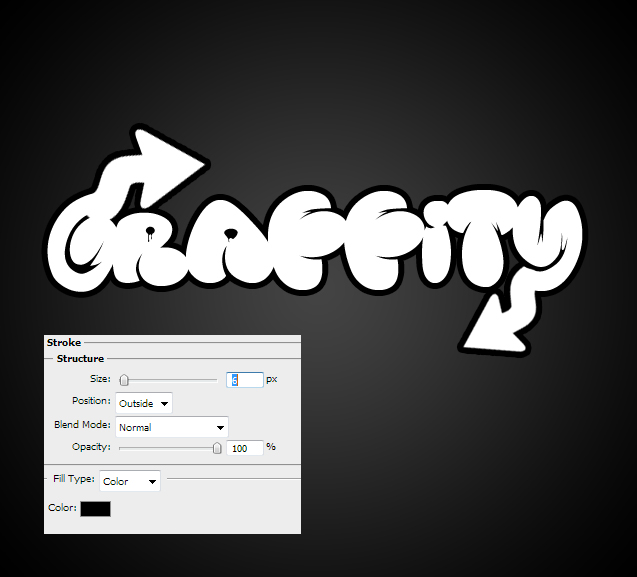
03. Go to Layer > Layer Styles > Stroke and add a stronger black stroke around your text.
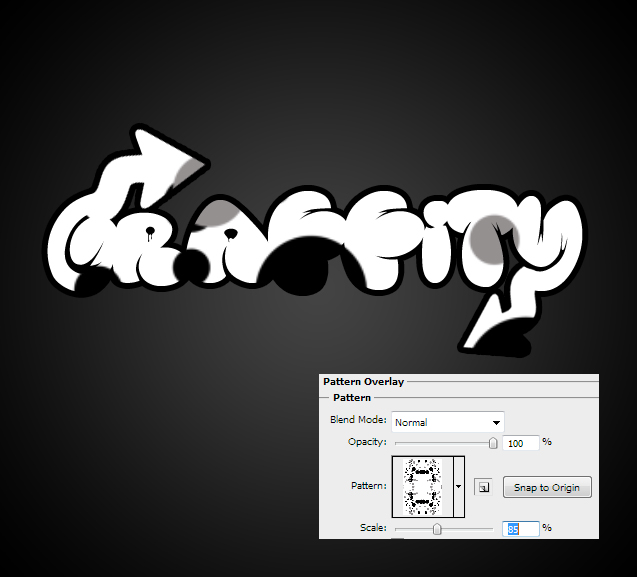
04. Move to the Pattern Overlay tab and add some shape pattern on the text (optional).
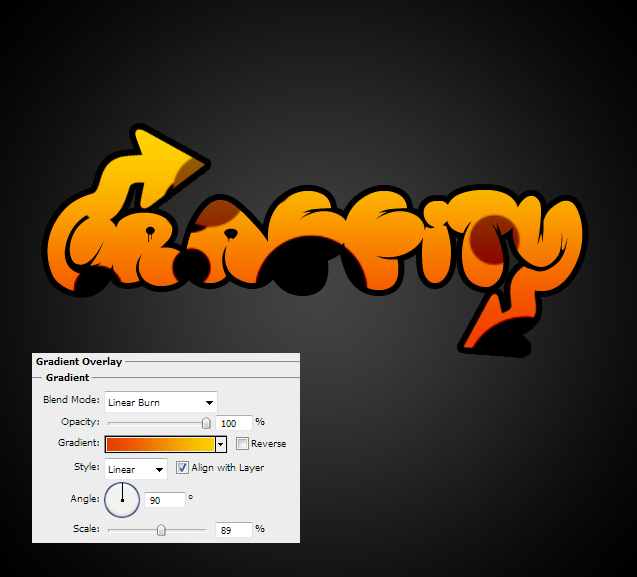
05. Go to Gradient Overlay tab and add a nice vibrant color to your text. Set the Blend mode to Linear Burn for the Pattern to pass through the color.
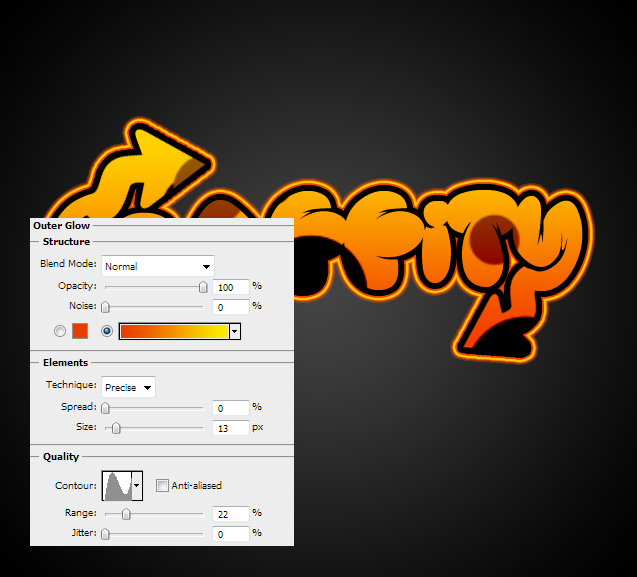
06. Under Outer Glow tab, add a strong stroke around the text.
07. And to finish up, go to Bevel & Emboss tab to add some nice roundness to the text. Press OK.
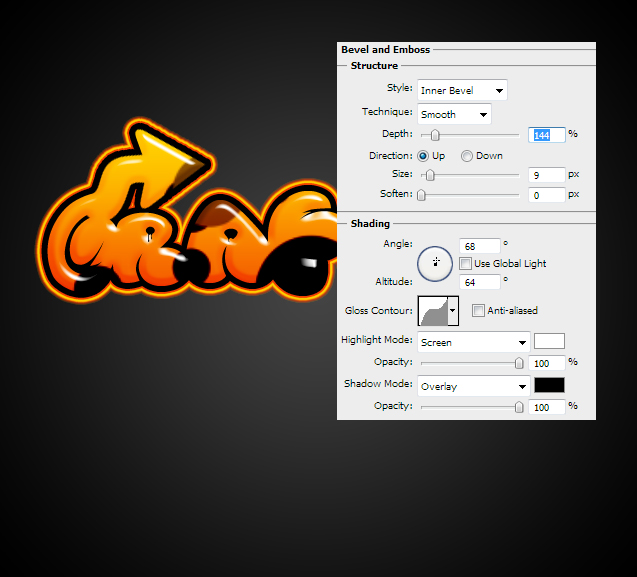
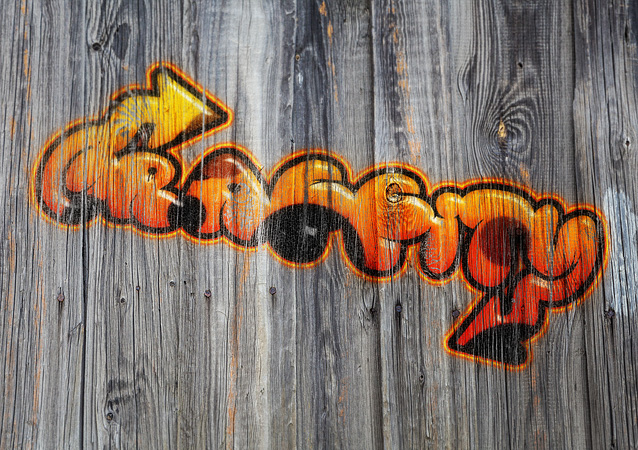
08. And your graffiti text style is done!


Now you’ve learnt creating Cool Graffiti Text using “Cool Graffiti Text Style Photoshop Tutorial”.