Learn to how to make a Logo for Print and web – Photoshop Tutorials
Today we are going to make a nice Logo for Print and Web. This means you can put this transparent logo on any website and also print it out with proper pixels.
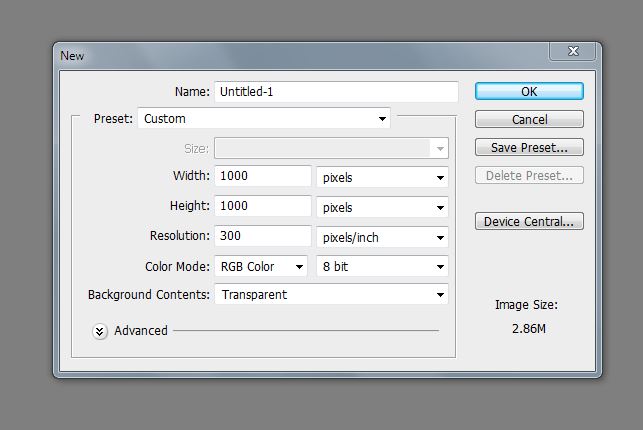
Step 1. Open a document with these dimensions and make sure to set resolution to 300:
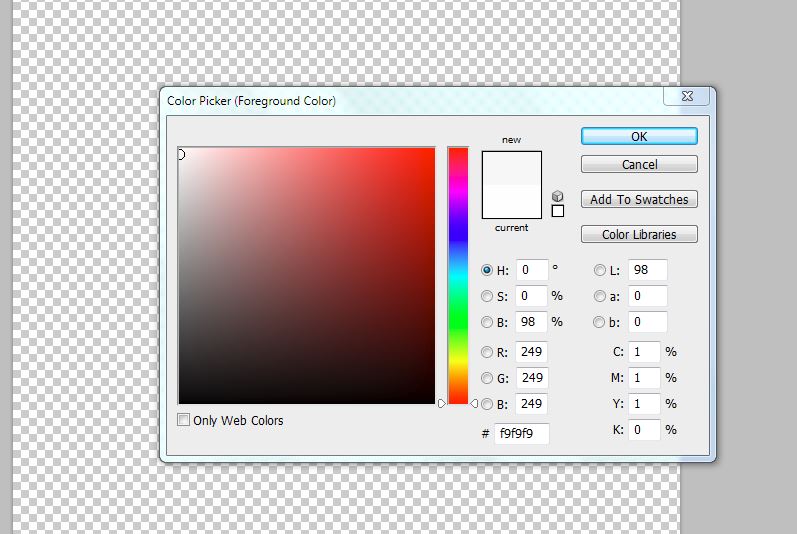
Step 2. We want to set a nice background just for drafting so let’s use #F9F9F9. Often times I will use a soft white like this instead of a pure white:
Step 3. This is how it should look on your canvas:
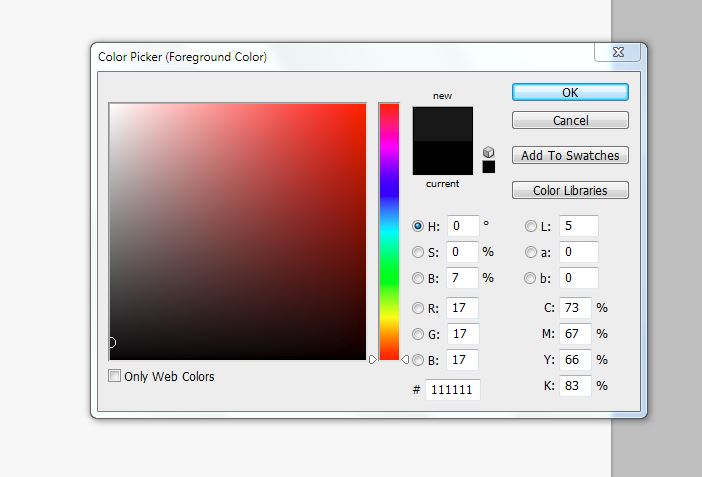
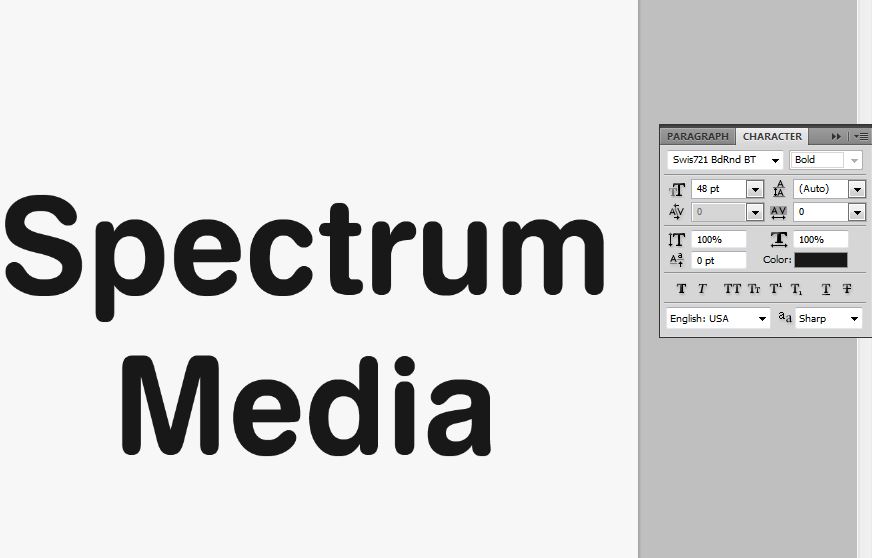
Step 4. Now you will want to choose a nice font color. When dealing with black my favorite is #111111:
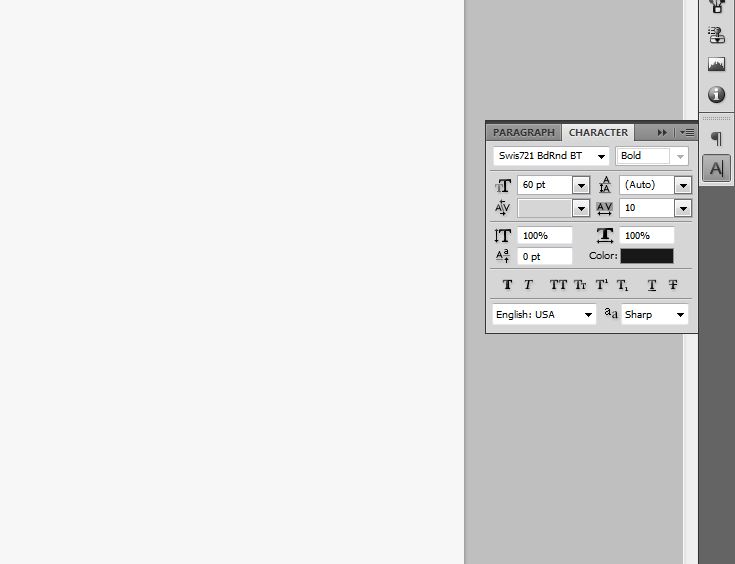
Step 5. You can choose any font you like. One my favorite fonts for general use is: Swis721 BD Rnd BT Bold:
Step 6. Type your logo or business name on the canvas and set font size to 48px:
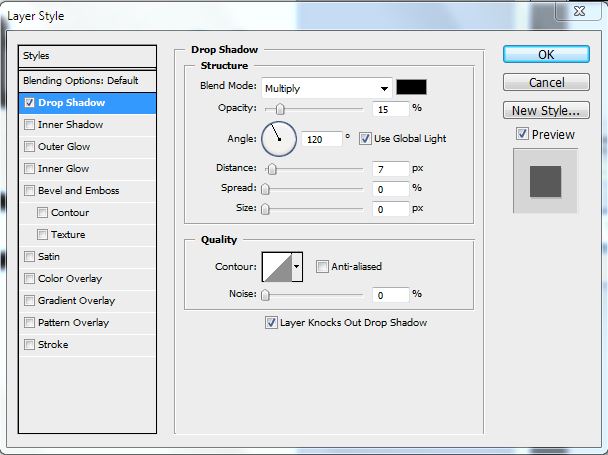
Step 7. Right click this Layer, choose Blending Options, select Drop Shadow and apply a very light drop shadow with these settings:
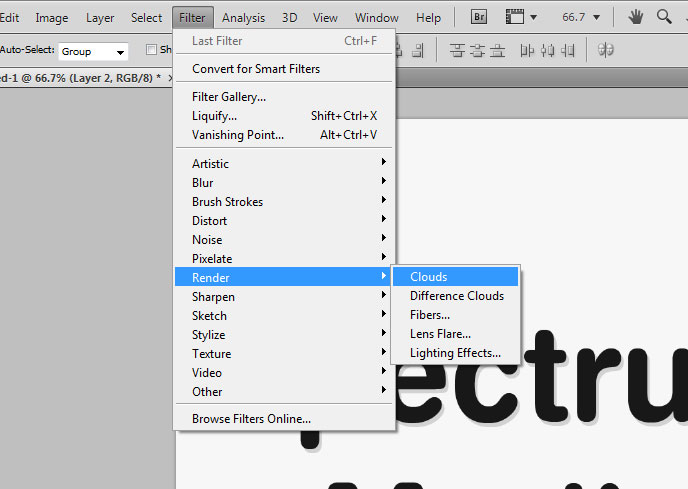
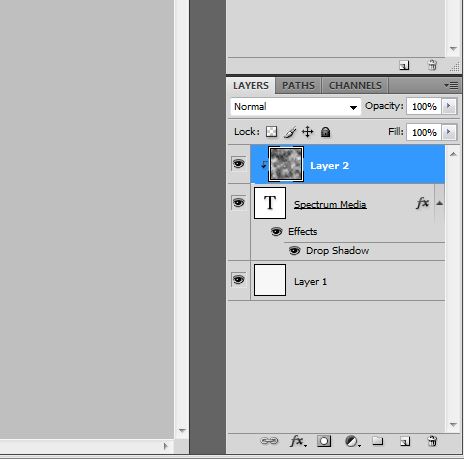
Step 8. Create a New Layer and make sure it’s above the logo. Then choose Filter > Render > Clouds:
Step 9. Put your mouse pointer between the two layers and hold down ALT key until the mouse point changes to the Clipping Group icon. This will clip the top layer to the bottom layer:
Step 10. You should have this effect:
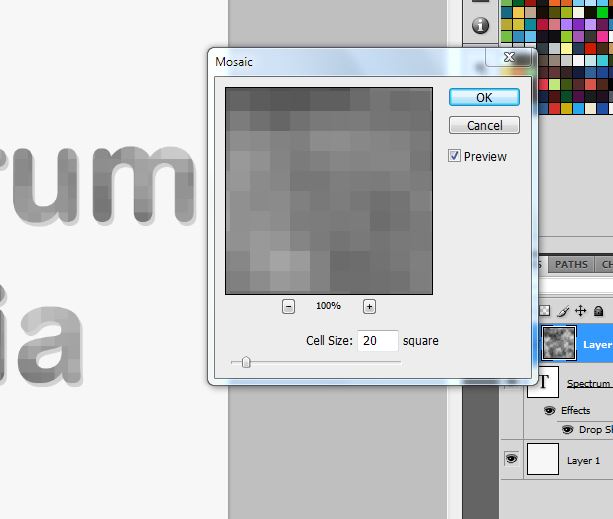
Step 11. Let’s give our logo some nice Mosaic pixels. Go to Filter > Pixelate > Mosaic and use these exact settings:
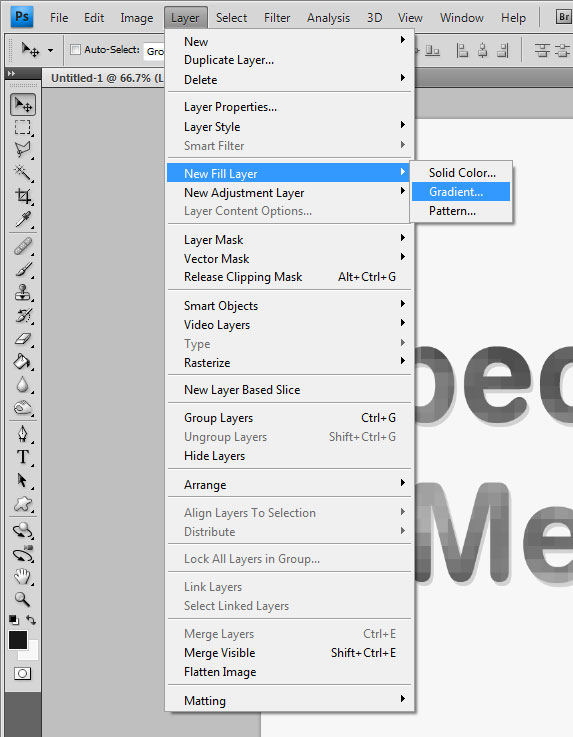
Step 12. Let’s add some color now. Go to Layer > New Fill Layer > Gradient:
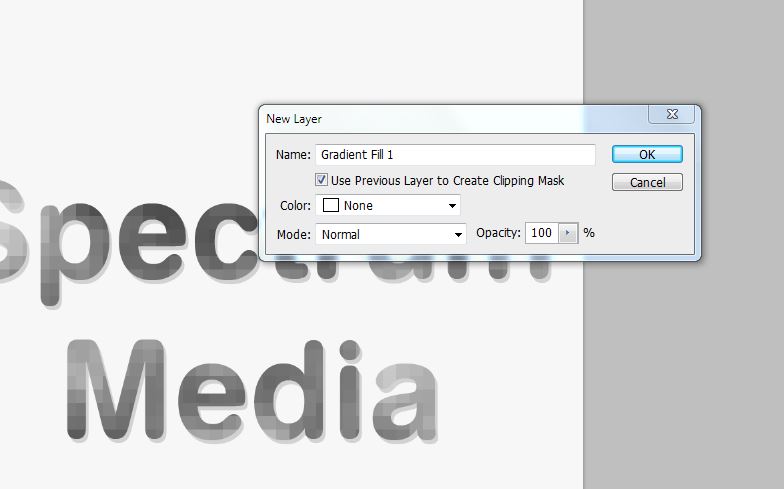
Step 13. Make sure to check the box that says “Use previous Layer to Create Clipping Mask” then click OK:
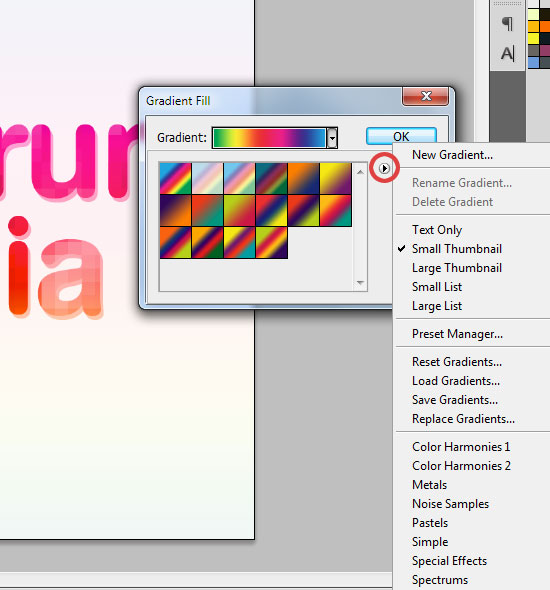
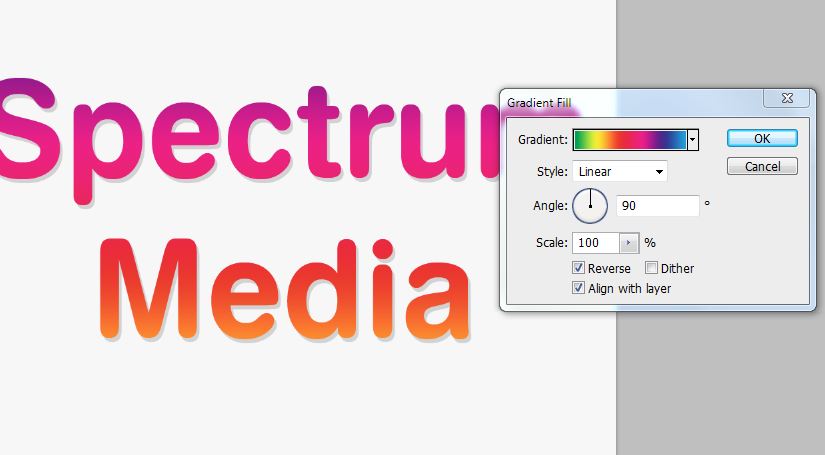
Step 14. Change the Gradient Fill by clicking the small preset Arrow and then choose Color Harmonies #1 and then select the first rainbow colored Fill as seen here:
Step 15. Once you have applied that double click the Gradient Fill layer so we can change the gradient to Reverse:
Step 16. Here are the results so far:
Step 17. Let’s go back and tighten up the Font a bit more. Select the Font layer, use these settings for the Leading and Tracking:
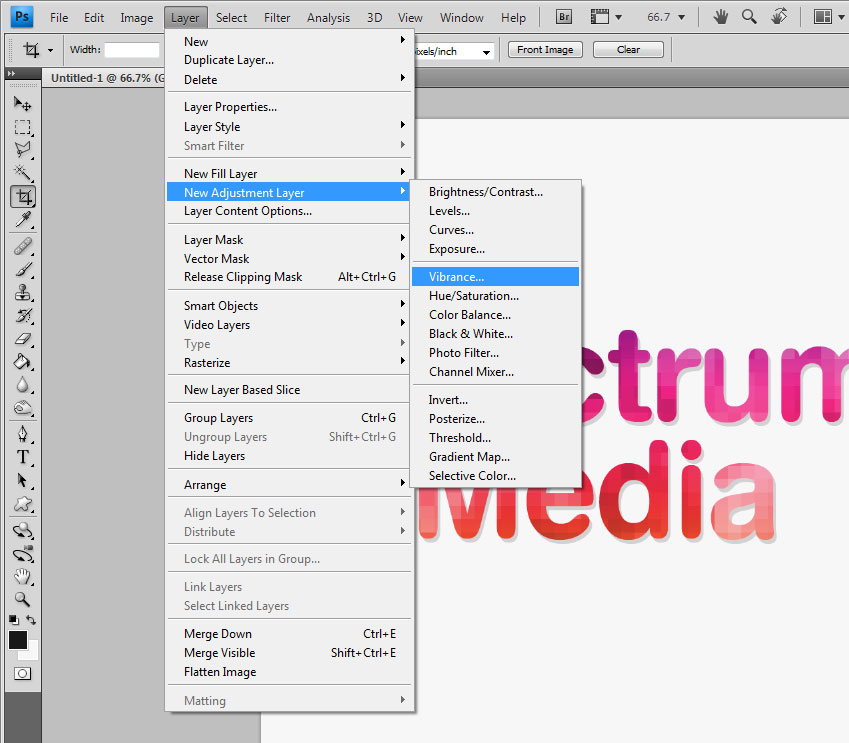
Step 18. Now it’s time to give our logo some Vibrance. Go to Layers > New Adjustment Layer > Vibrance:
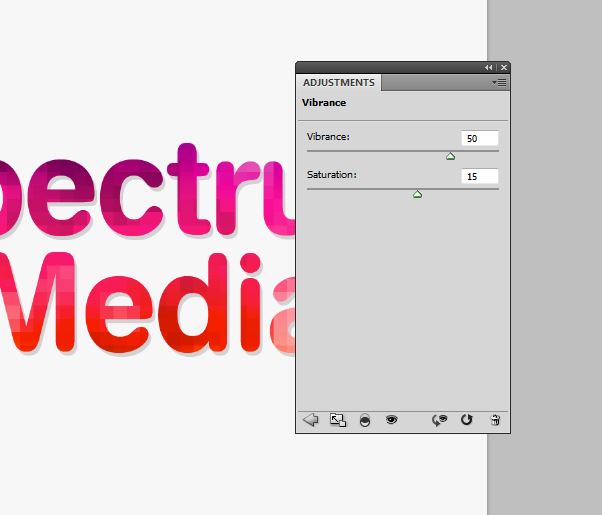
Step 19. Adjust the sliders to match these settings:
Step 20. We are all done! If you need a transparent logo you can turn off the background layer, then go to File > Save for Web & Devices. Then make sure you choose PNG24 and click Save. Here is the final result:
Hope you liked our “How to make Logo for Print and Web – Photoshop Tutorials”.
