This tutorial will show you how to use a very powerful and useful tool in Photoshop – the Refine Edge.
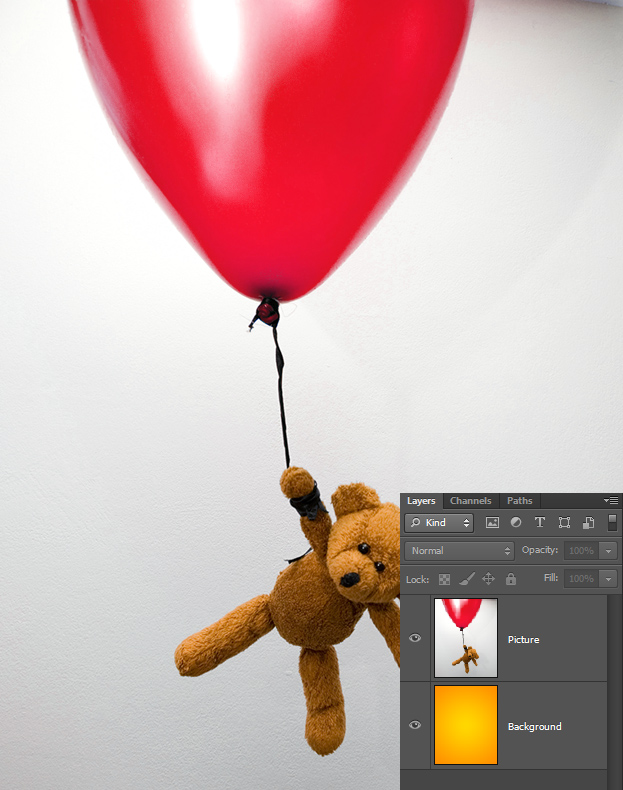
01. First open a picture where you’d want something to cut out and then refine the edges of that cut out. We’d like to change the background of the picture to a bright orange that is already ready in the layers panel and is set under our current layer. But for the background to show, we need to cut out the original gray-white background.
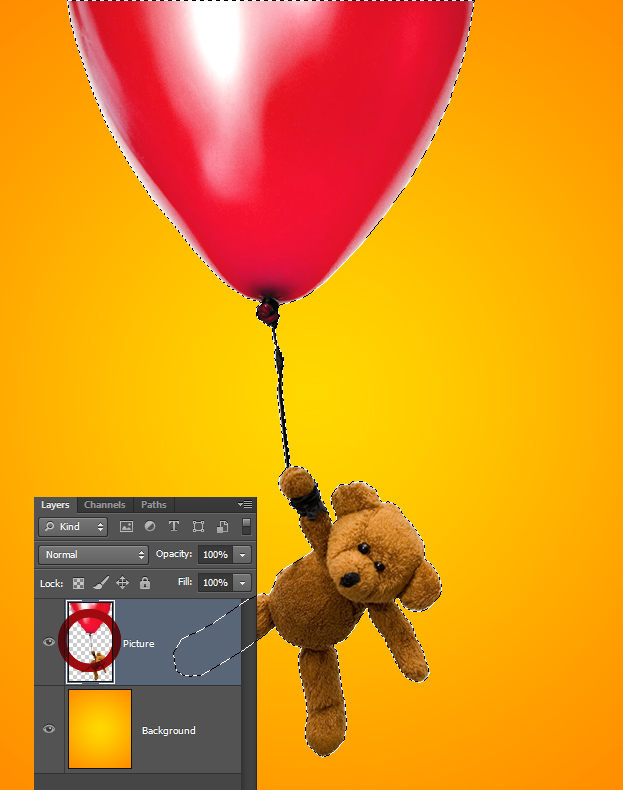
02. To cut out the picture, use any of the Lasso tools or other cutting tool – whichever is more comfortable to you. As you can see, we’ve done the cutting rather roughly and some of the white edges still show.
03. If you have cut out the whole picture, Ctrl (Command on Mac) + click on the thumbnail of your cut out picture so that it gets selected. It is needed since the refine edge command can be accessed only if an area is selected.
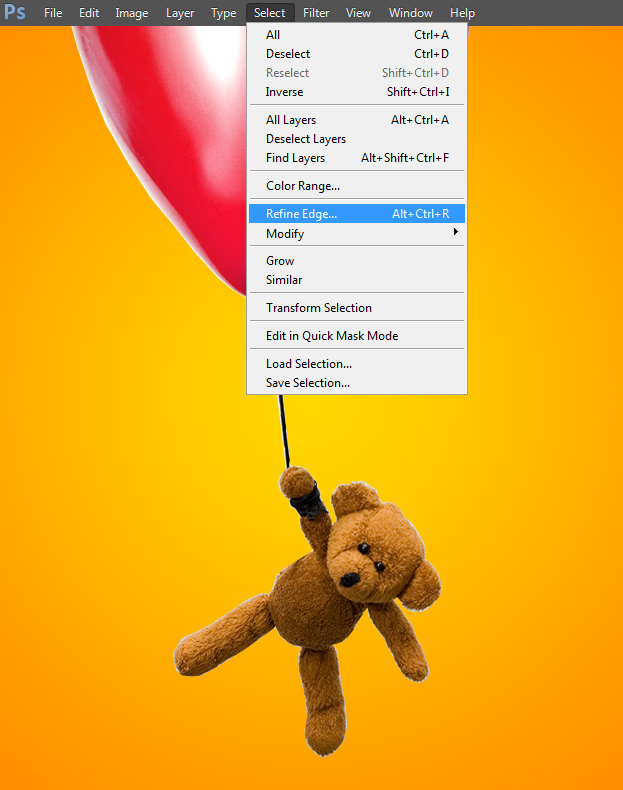
04. Now lets finally go to Refine Edge. Fot that, go in the menu to Select – Refine Edge.
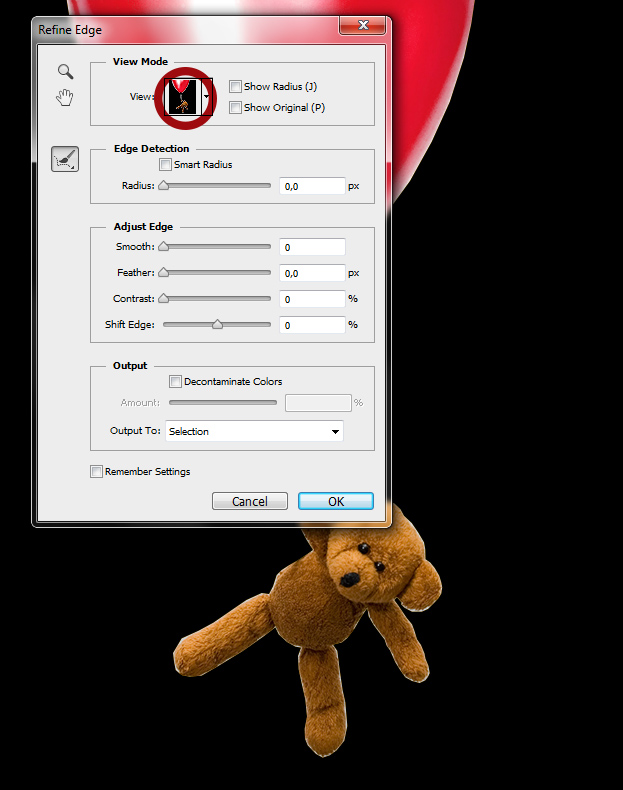
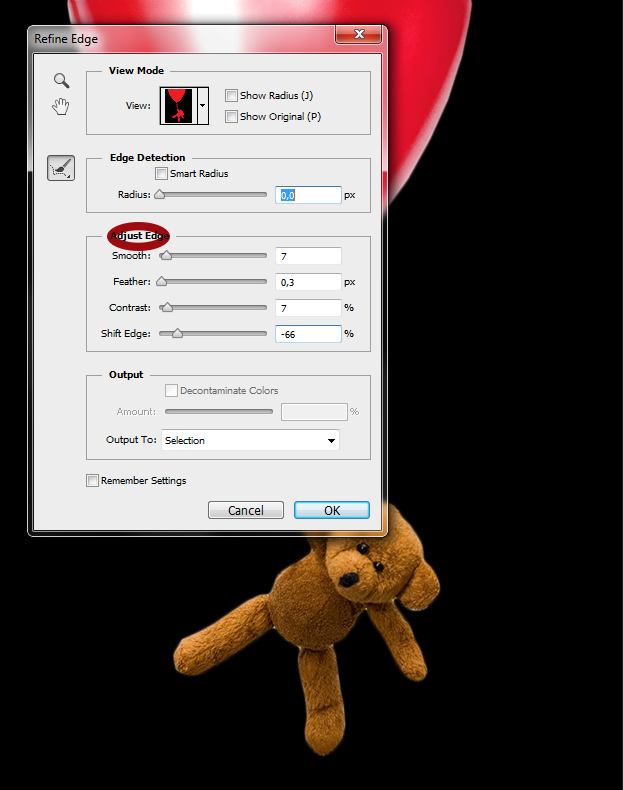
05. A new small window will open and the background color of your image will be probably changed. But don’t get alarmed, this is only for the edges to show better. When the image has been cut out from a light background, black on the background will show the areas which need to be corrected more clearly. But if you have other color edges, then you can always change the view in the View (circled below). Remember, Refine Edge is meant to make your cut out edges look better, so it is important to see what is wrong, so always choose your background.
06. If view is chosen, then jump to Adjust Edge. There you will see couple of bars that all help you to make your edge better. Smooth smooths the edge out, Feather makes the edges more blurry, Contrast adds more sharpness to the edge and Shift Edge either adds or cuts off a bit of the edge depending which way you move the bar – to the positive or negative. You’ll also have a live preview how the edges would look after applying the Refine Edge. If you are done, just click Ok.
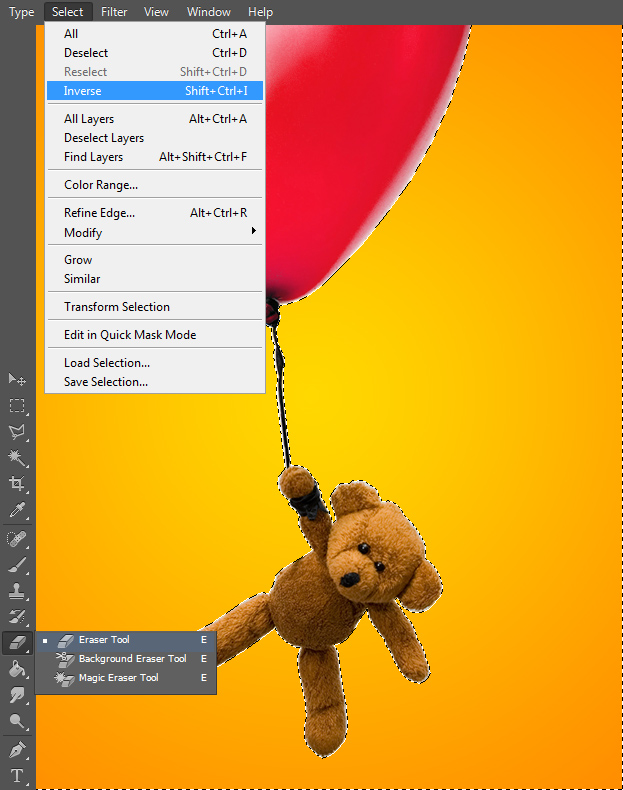
07. When pressed Ok, don’t deselect the selection, but go to Select – Inverse to inverse the selection that refine edge made and hit Delete button or take the Eraser tool to erase the bad edges you wanted to get rid of.
08. And voila! The background is changed and the edges look good thanks to the Refine Edge in Photoshop!
