This tutorial will show you step by step How to Create Candy Cane Text Effect in Photoshop.
01. Open a new document and fill it with any color or background. This tutorial uses a green image with slight shades of christmas trees just to fit the candy cane theme. Now select the Type tool and write your text. As a font, use something that is bolder. On bold text the effect will be more visible and nicer. In this tutorial we use the Candy Script font .
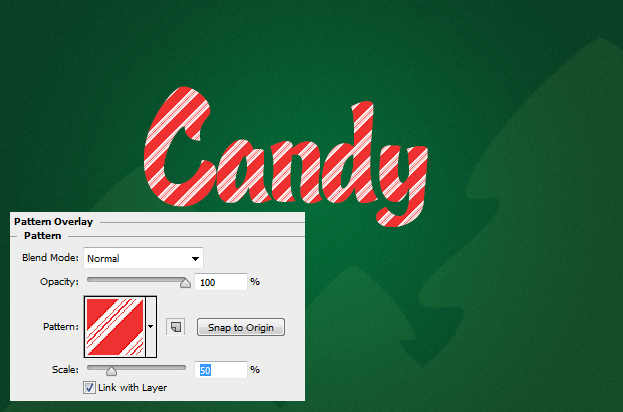
02. Now go to Layer > Layer Style > Pattern overlay and pick a pattern with stripes – horizontal, vertical, diagonal.
03. If your pattern is another color or lacks color, then move to Gradient Overlay tab and add some red gradient over the text. To blend the color to your pattern, try out different Blend Modes.
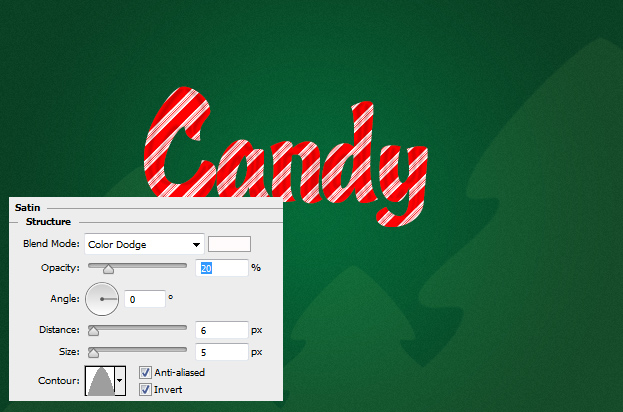
04. Time to give a little texture to the text. For that move to Satin tab and add the settings below.
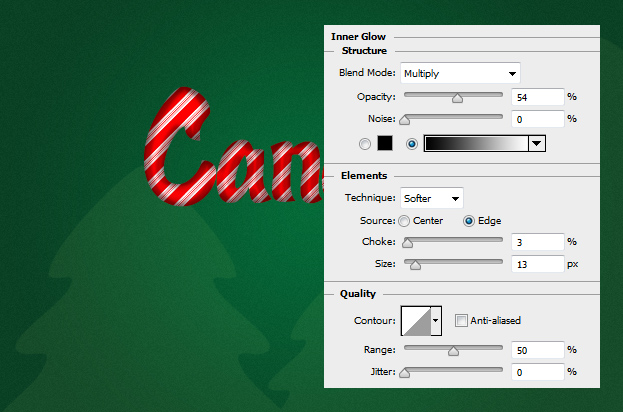
05. Time to give the text some 3D effect. Go to Inner Glow tab and add a dark glow on the inner edges.
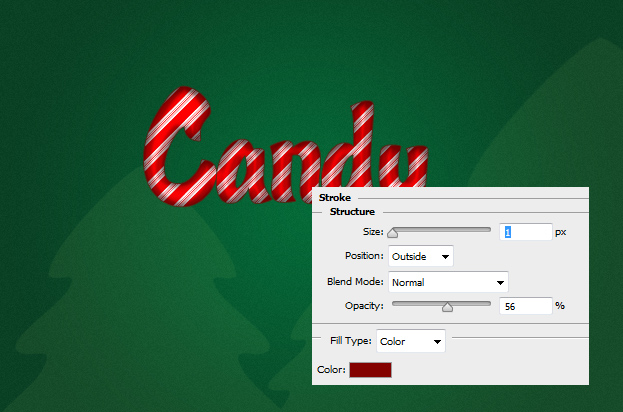
06. Move to Stroke tab and add a small 1px stroke around the text.
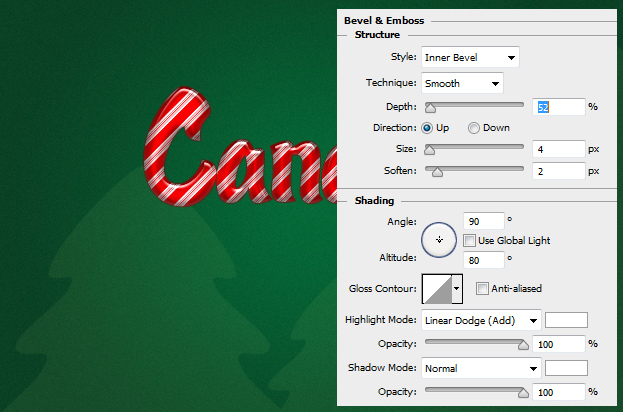
07. Add some shine and gloss from the Bevel and Emboss tab. If the gloss is added then you can finally press Ok to add all of the effects.
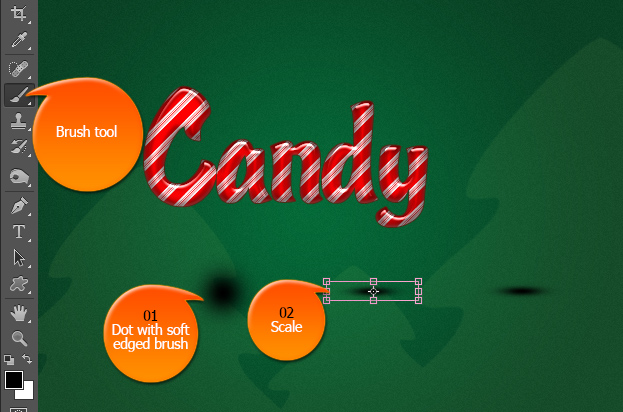
08. Time to add some shadows under the letters. First create a new layer in the menu Layer > New > Layer. Then pick the Brush tool, set the color to black, right click on the background to choose a soft edged brush and just make one dot on the new layer. Now you have a round soft-edged dot. Go to Edit > Transform > Scale and drag the dot into flatter version. Press Enter. Now you have a flat soft dot.
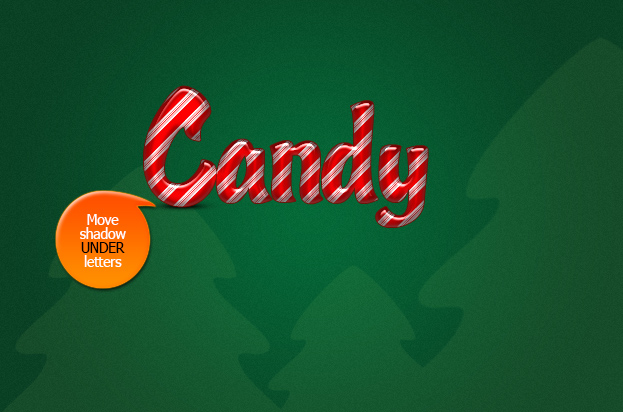
09. Move that shadow under your first letter. Be sure the shadow layer is also under your text layer. Now duplicate the shadow layer by right clicking on the layer and choosing Duplicate layer. Move that shadow under the next letter and so on til all of the letters have the shadow.
10. And your candy cane text effect is ready to be used! You can also add the same effect to any shape like to an actual candy cane. Just right click on the text layer and choose Copy Layer Style, then right click on any other shape that don’t have the effect and choose Paste layer style – voila! The shape also has the effect.
How to Create Candy Cane Text Effect in Photoshop?

