You got a nice picture where the ground is all wet but couldn’t catch any rain on the photo? No worries, this tutorial will show you how to create a rainy effect from scratch in Photoshop.
01. Open a picture were the sky is cloudy or there are some evidents of wet ground so the added rain would feel at its place.

02. Create a new layer (Layer – New – Layer from the menu). Take the Paint Bucket tool and color the layer all black.

03. Then go to Filter – Noise – Add noise and add a good amount of noise on your background. Press OK.

04. Then go to Image – Adjustments – Levels and move the black, grey and white arrow all in the middle so you’d reduce the noise to fewer white dots. Press OK.

05. Then go to Filter – Blur – Motion Blur. There set the Angle according to which angle you’d wish your rain to fall and then set the Distance to make the drops either shorter or longer. Press OK.

06. Then go to Levels again (Image – Adjustments – Levels) and set all three arrows athe the beginning to get more white out of the drops. Press Ok.

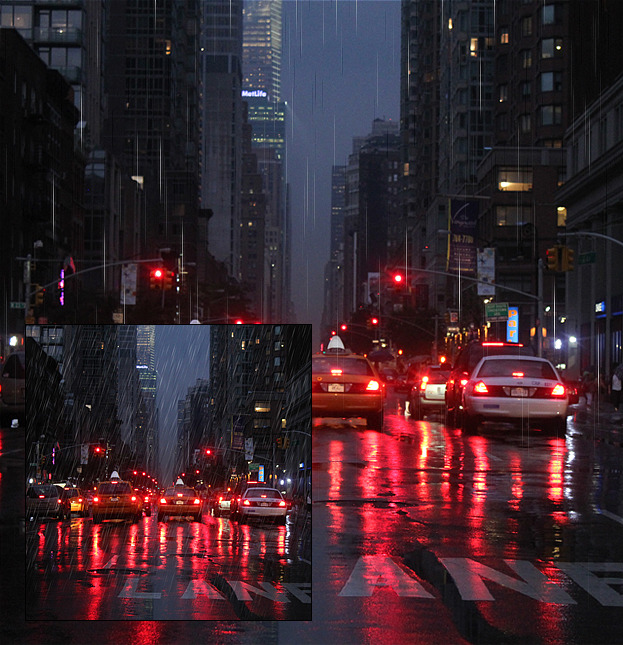
07. Set the layer’s blend mode to Exclusion. Now if you wish, you can go again to Filter – Blur – Motion Blur to make the water drops longer or a bit blurrier.

08. And now you know how to create rain in Photoshop. Be sure to play around with the angles and other setting to get other rain effects according to your wishes.
