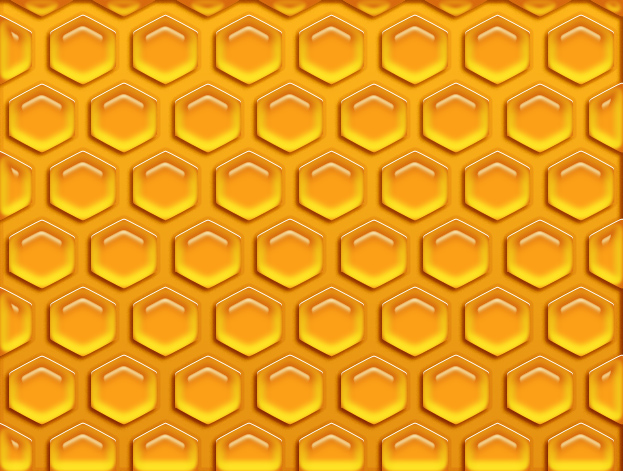
This tutorial will show you how to create honeycomb texture from scratch inside Photoshop.
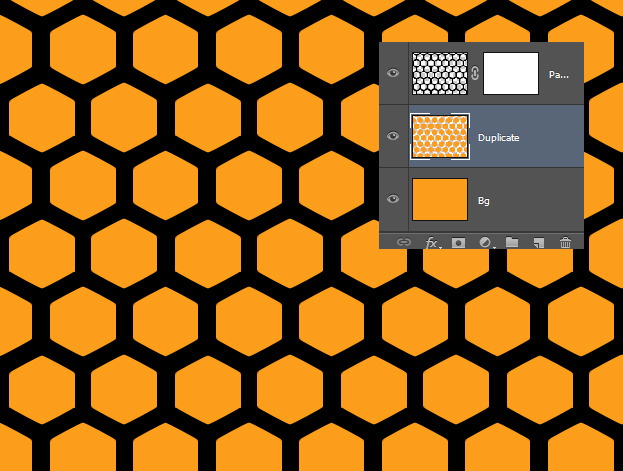
01. Create a new document, fill it with honey orange color and then duplicate the background by right clicking on the original layer and choosing Duplicate layer.
02. Since honeycomb pattern is not one of Photoshop’s defaults, then you’ll have to load honeycomb pattern in your patterns. After it’s done, click on the fourth icon at the bottom of the layers menu and choose Pattern. Now a small window opens. Choose your pattern and press Ok.
03. Now right click on your pattern layer and choose Rasterize layer. Then hold Ctrl down and click on the pattern’s thumbnail. Like this, you’ll create a selection of the combs. While the selection on, go to the duplicated layer and press Delete. The picture doesn’t change, but from the layers you’ll see that the orange is cut.
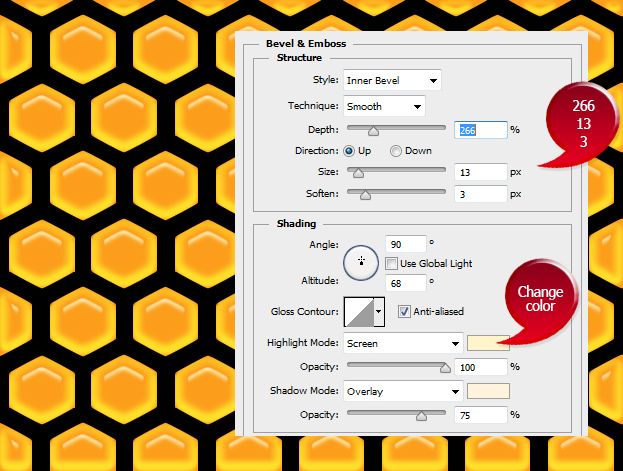
04. Keep the duplicate layer selected. Now go to Layer > Layer Styles > Bevel and Emboss. A new window will open where you have couple of values to set. Don’t press Ok yet.
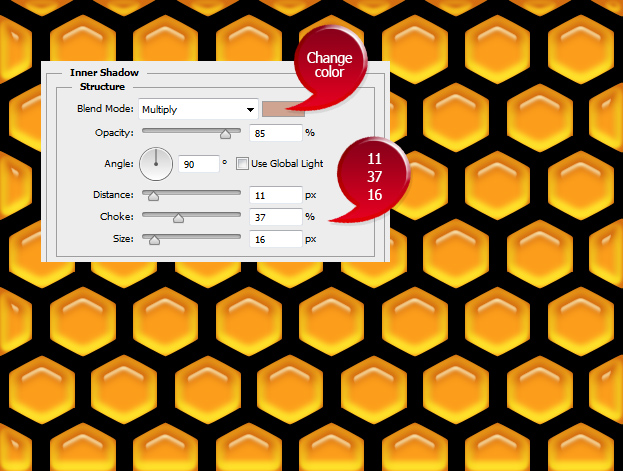
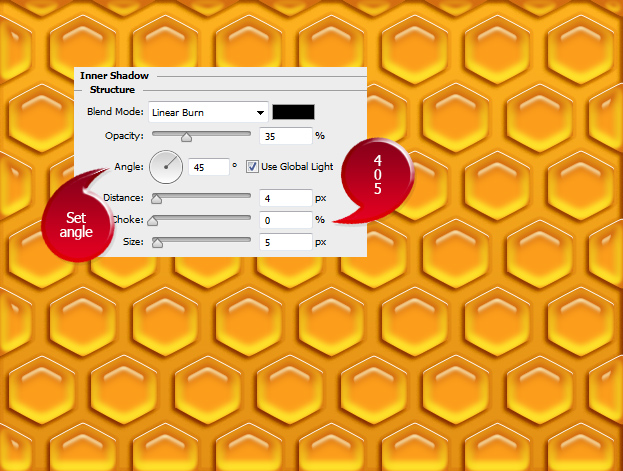
05. Move from the same window to the Inner Shadow tab. There again, set some values and press Ok.
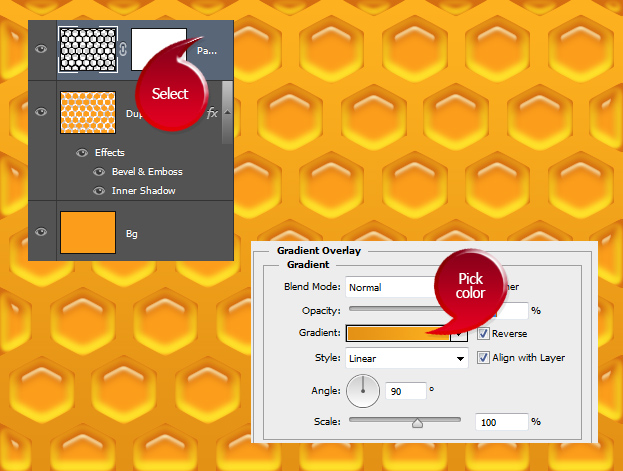
06. Now select the pattern layer. Then go to Layer > Layer Styles > Gradient Overlay. Set the color of the honeycomb gaps.
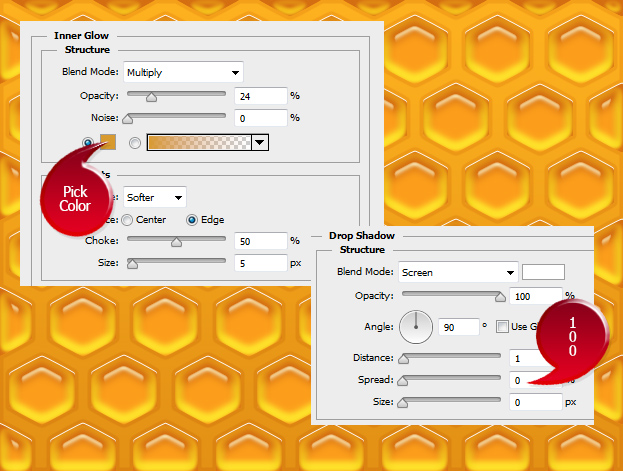
07. Move on to Inner glow tab and set a small inner glow to your combs and then add a small highlight shadow from the Drop Shadow tab.
08. Move to Inner Shadow where you’ll add some shadow to make the combs look more out. Press Ok.
09. And your honeycomb texture is ready to be used!


