This tutorial will show you how to create a realistic iPhone in Photoshop.
01. Open a new document and set your background to any color of your wish.

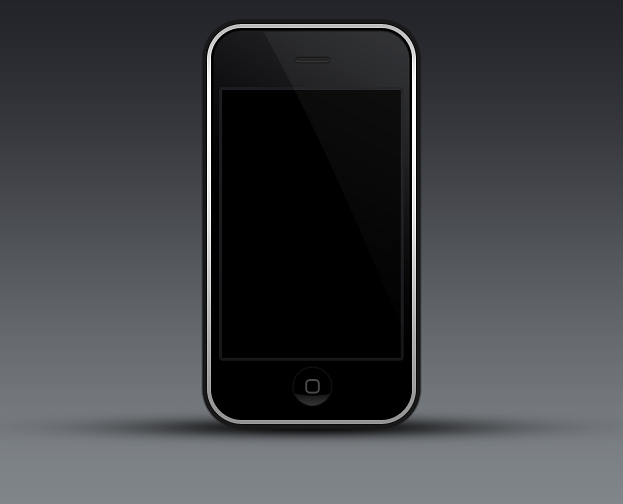
02. Take the Rounded Rectangle tool, set the Radius about 30-35 and create your iPhone shape.

03. Double click on your shape and go to Gradient Overlay. Set the angle to about 63 and set the gradient from black to darker grey. Then go to Outer Glow, set the blend mode to normal and add a darker grey edge around your shape. Don’t close the window yet.

04. Then go to Stroke and add a gradient stroke around the shape (grey – white – grey). Then go to Inner Glow and add a black, blend mode normal inner shadow. Press OK.

05. Now it is time to create the screen. Take the Rectangle tool and draw a shape in the middle of your phone’s edges. Double click on your new shape and set the gradient. Press OK.

06. Now lets create a speaker. Take the Rounded Rectangle tool and drag a small flat shape of darker grey color.

07. Take the Rounded Rectangle tool again and inside that small shape draw an even smaller shape. Zoom in if necessary.

08. Double click on your small shape layer and go to Stroke. There set a 1 px black stroke around the shape. Then go to Color overlay and set the color to dark grey and after that, go to Drop shadow and add a very small white shadow on the shape. Press OK when done.

09. Now its time to create a button on the lower side of the phone. Take the Ellipse tool, draw a circle that is the same color as the lower part of your phone (black). Double click on your circle layer and go to Outer glow to add a very small lighter shade around the button. Press OK.

10. Take the Rounded Rectangle tool and in the middle of your circle button create another black shape. Double click on it and enter the Stroke. There set a lighter grey 2px stroke around the shape. Press OK.

11. Time to add a highliht. For that create a new layer (Layer – New – Layer) and draw the same size circle as your button. Color it with white.

12. Select the upper part of the white circle with the same Elliptical tool and delete the upper part of the shape. Then go to layers window and lower the opacity.

13. Create a new layer again. Take the Polygonal Lasso tool and make a diagonal selection of the screen and color it with white.

14. Lower the opacity of the selection considerably and also delete the lower part a bit with an eraser tool.

15. Create a new layer again and drag the new layer under your phone layer. Now take the brush tool, set the color to black and make one click in the middle of your document.

16. Go to Edit – Transform – Scale to make the shape flat and wide. Press Enter when satisfied. Also, lower the opacity after that a bit.

17. And your iPhone is ready to use!
