This tutorial will show you how to create a colorful button with an extra price space.
01. First lets create a nice background. Open a new document, double click on the Background layer and press OK to make it into a regular layer and then double click again to enter Layer Styles window. There select Gradient Overlay, set the Style to Radial and set the color, the middle color being lighter than the outer. Press OK when done.
02. Pick the Rounded Rectangle tool, set the Radius from above menu about 10-20 for more rounded edges and drag your shape. A color is not important at this stage.
03. Double click on your newly made shape layer in the layers window (Window – Layer if you cannot find it) and a popup opens. There go to Drop Shadow and add a small size 2, distance 2 shadow under your shape. Then go to Gradient overlay and set your button’s color. Don’t close the window yet.
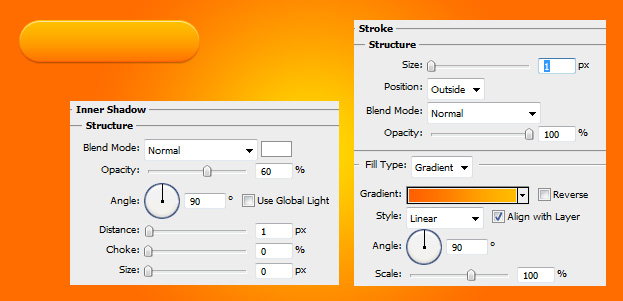
04. Then go to Inner Shadow, set the blend mode to Normal white, angle to 90 and distance to 1. Then head to Stroke and set a gradient 1px size stoke around your button. Press OK when ready.
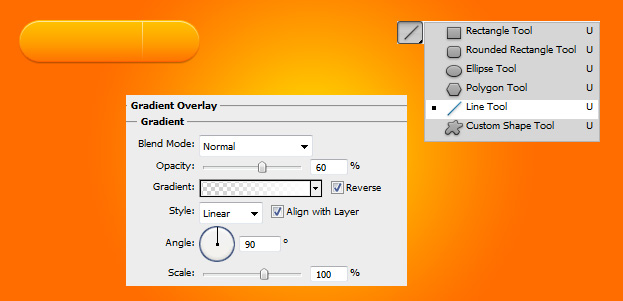
05. Now take the Line Tool and drag a line across the right side of the button. Then double click on your new line shape layer and enter Gradient Overlay. There set the upper side of the gradient to white and lower to transparent or the same color with the lower gradient of your button. Press OK.
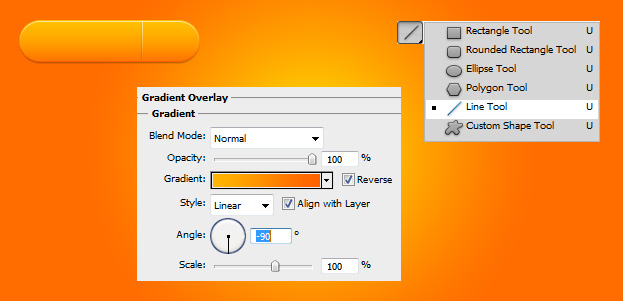
06. Drag another line with the Line tool and move it right next to your 1st line. Again, double click on it and this time set the lower part of the line darker orange so it would show and the upper part a bit lighter orange but that it would also show. Press OK.
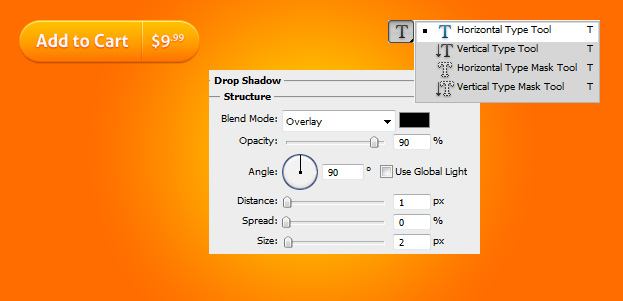
07. Now take the Type Tool and insert your text. Then double click on your text layer and enter Drop Shadow. There set the black shadow to Overlay, distance to 1 and size to 2.
Move your button right in the middle if it is not there yet and its ready for use.


