This tutorial will show you how to create a slide on-off button in Photoshop.
01. First lets create a background. For that open a new document, pick the Gradient Tool, set the color and drag on the bacground in the direction you wish your color to be.
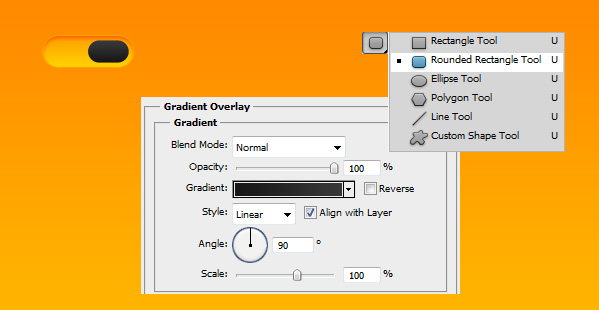
02. Now lets start making our first button. Select the Rounded Rectangle Tool, set the Radius from the menu above about 10-20 to get very round edges. Then drag a shape.
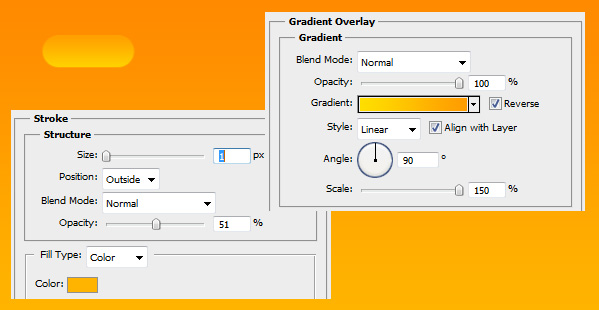
03. Double click on your new shape layer in the layers window (Window – Layers) and go to Gradient overlay. There set the angle to 90 and choose your color. After that, go to Stroke to add a small stroke around your shape. Let it be the lightest shade of your button color and play around with opacity to get the best result.
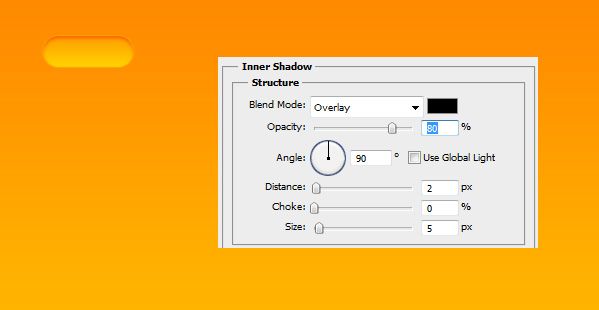
04. Now go to Inner Shadow and add a small shadow. Set the Blend mode to Overlay, Lower the opacity, angle to 90, distance to 2 and size to 5. Press OK.
05. Now lets make the slider. Again, pick the Rounded Rectange tool and this time draw a smaller shape inside your previous shape. About half the size. Double click on the slider layer and go to Gradient Overlay. There set the color and angle to 90. Press OK.
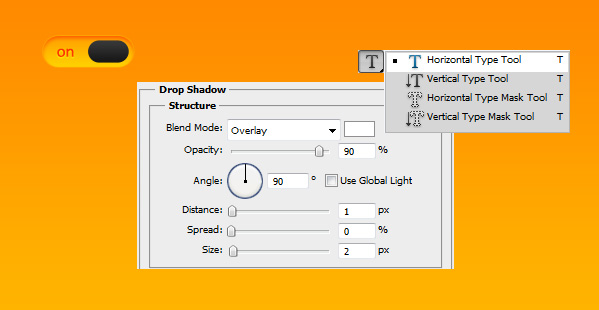
06. Take the Type tool and type in your text. Double click on the text layer and choose Drop Shadow. Set the blend mode to white Overlay. Angle to 90, distance 1 and size 2. Press ok. Your ON slide button is ready.
07. With the off slide button just follow exactly the same steps. Ony set all the colors to inactive such as grey and move the slider on the other side. And your on-off slider is ready!


