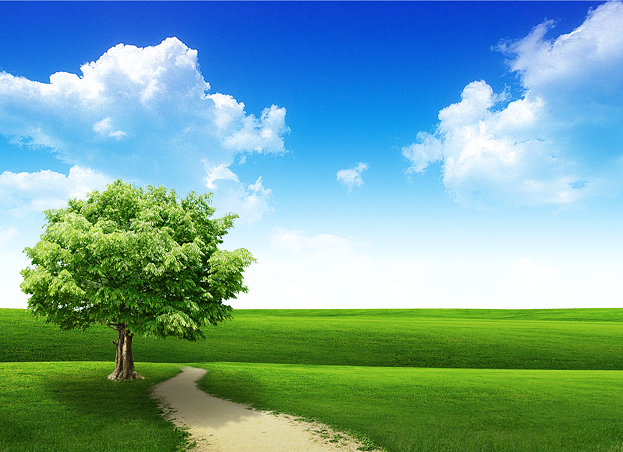
You need a nice scenery but cannot find the perfect on you need? Why not create your own? This tutorial will show you how to create a scenery using different pictures.
01. Create a new document. Double click on the background layer to make it into a regular layer. Double click on it again to enter the Layer Styles window. There set the gradient angle to 90 and pick a color from white to blue the white being the lower color.

02. Open a picture that has nice grass on it and cut the grass part out using the Polygonal Lasso Tool. Place it on the background color.

03. Cut another piece of grass and place it a bit above the other grass. Be sure the upper grass layer is under the other grass layer (Window – Layers).

04. Open a picture with clouds and place the picture on the backround layer but under the grass layer.

05. Set the layer style of the sky to Screen so that it would nicely pass through.

06. Open your road picture and cut it out with some grass still attatched to it. You may need to delete some exess parts with the Eraser tool to get the best result. So the grass and the road itself would fit on your other grass try to get the same tones by moving the bars in the color balance (Image – Adjustments – Color Balance).

07. Open your tree picture, drag it on your background and cut the tree out by using the Polygonal Lasso tool or Magic wand tool.

08. Create a new layer (Layer – New – Layer) and drag the layer under your tree layer. Now take the Brush tool, choose the color black and make a circle. Set the circle’s opacity about 35% and then delete the edges of the shadow irregular way so it looks like the leaves and such are reflecting.

And your perfect scenery is ready for display!