This tutorial will show you how to create a realistic steel plate with engraving in Photoshop.
01. First create a new document, double click on it and select Gradient Overlay. There set the Style to Radial and set the inner color lighter and outer color darker.

02. Create a new layer and take the Rectangular Marquee Tool. Select the area you wish your bar to be.

03. Now fill the selection with any color you wish.

04. Double click on your new shape layer, choose Gradient Overlay from the new window, set the Angle to 90 and color from dark to light (set the colors like that dark-grey————-lighter grey-white = 4 colors).

05. Now create a new layer, select the new layer and the shape layer and press Ctrl + E (Command E). Now they are one layer.

06. Go to Filter – Noise – Add noise and add a decent amount of noise on your shape. Press OK.

07. Now go to Filter – Blur – Motion Blur, set the angle to 0, set the Distance and press OK.

08. Go to Edit – Transform – Scale and drag from the right-middle box outwards and the same with the left side to fix the edges of the bar. Press Enter.

09. Now go to Filter – Sharpen – Smart sharpen and sharpen your bar a bit.

10. Take the Type tool and add your text.

11. Double click on your text and go to Color Overlay to set the color to gray (about the same gray as your bar is) and then go to Inner Shadow. There set the Angle, Distance, Choke and Size.

12. Then go to Outer Glow and add a very small amount on the outer edges of the text.

13. Merge layers and add some more highlights with the Dodge Tool and Some darker shades with the Burn Tool.

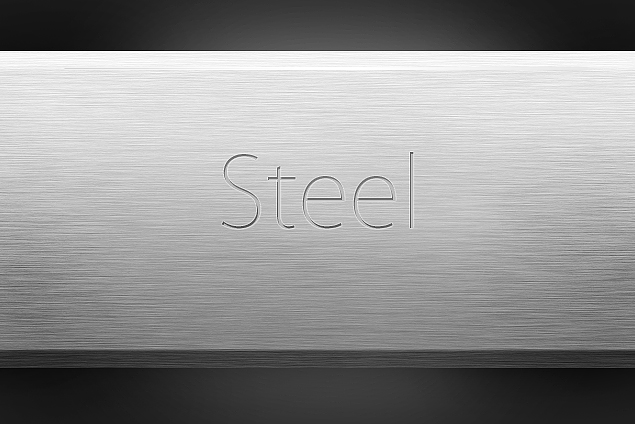
14. And your steel plate with engraving is ready!