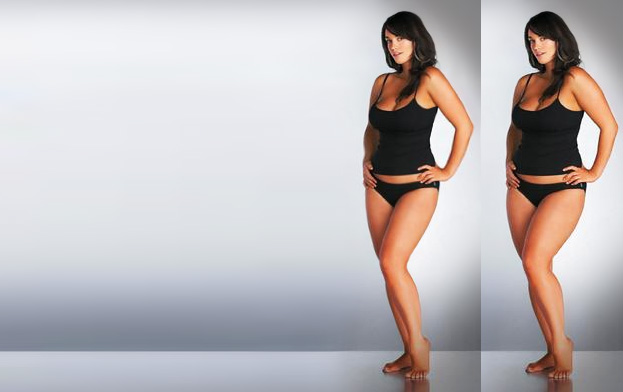
This tutorial will show you how to make a person on the picture look more thinner by using Photoshop.
01. Open a picture you wish to work on (the model on the picture of this tutorial, looks perfectly fine and serves just an educational purpose of how a tool in Photoshop works), and duplicate your layer – right click on the original layer and choose Duplicate layer.

02. Go to Filter – Liquify, zoom in onto your picture by using the magnifying tool. Then take the Tool that is the 4th from down and paint on the background parts you wish not to be moved or modified during the process. Don’t worry, the red wont be there if you press ok. Also, don’t paint on the places which you wish to modify, such as bodyparts.

03. Then pick the 1st tool from top left (a hand) and set the brush size accordingly which part you are fixing, so you will find yourself many times changing the size. Now it is nothing more to do but to start dragging the curves more inwards (look at the arrows on the body). Where you are less satisfied, just drag it more in. But don’t go over the top with your changes. A subtle push is much more realistic and believable.

04. Press OK and you are done. As you see, the model looks much more thinner in a natural way. You can also use the same technique to make muscles bigger.